- Loading…

This is a 5-day track focus on Wearable technology and the way Wearable works, in addition to how it related to fashion and its benefits of this technology in the daily life. Also, we will have the chance to introduce Microcontrollers to understand its role in wearable technology.
Days:
In this day we will introduce Wearable technology to the participant in order to understand the way this tech. Works. They will also understand the fields of this technology involved in, in order to understand the variety of applications of this tech. Able to change and affect.
1- At the beginning we will start by an Ice braking question to drive their attention to what we are going to deliver.
“What does wearable means to you?”
Most of the participant hears this term for the first time, and they are not aware of this technology.
In this section we will go through what is meant by wearable technology and its types.
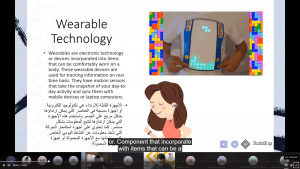
1- We will firstly go through what is meant by Wearable Technology.
“Wearable are devices incorporated into items that can be comfortably worn on a body”.

2- Then we will go through the types of wearable are used and the purpose of using such tech.
“Wearable are used for the purpose of tracking information to be processed for farther analysis.”
3- We can ask the participant to provide an example for a wearable they might see or used?
4- Then we will go through the types wearable have.


In this section we will introduce IOT to the participant and how this technology is improving the fashion industry.
1- We will begin by directing a question to the participant regarding if they have seen this technology around?
“Most of the participant answer will be no”
But they already dealt with this technology as it is used in State of Qatar in every parking area.

2- We will let them know that IOT is referred to every thing connected to the internet especially sensors connected where they keep sending data.

3- Then we will go through some of these sensors that are connected with wearable that can be also connected to the internet.

4- Then we will show them this video about wearable.
In this section we will go through some wearable technology that are involved in the fashion industry and how it benefits the industry.
1- We will introduce the participant to the conductive fabric which is made out of steel threads.

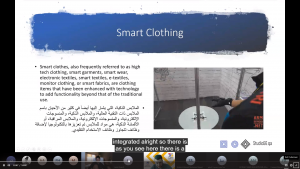
2- Then we will go through the smart clothing industry where smart sensors and smart textile are added for further functionality than the normal traditional use.

3- After that we will introduce the flex circuit where normal circuits are made and printed over flex boards can be added to clothes without feeling that there is solid equipment in your clothes. 

In this section we will introduce the participant to the board that they have to deal with and simulate their application on it.
1- We will introduce the participant to the brief definition of the MCU where it says that MCU is a miniature computer with restricted abilities.

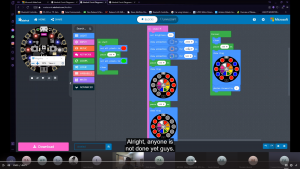
2- After They know the board they will work on we will start simulating the board on adafruit simulation platform.

3- Then we will give the participant a quick tour in the platform.

4- This is the main page after access to the platform link.
5- first we will press on a new project to start the simulation.

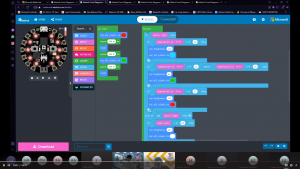
6- This is the workspace for building the code.
7- The result will appear at the virtual board at the left of the screen.

8- Then we will show participant how to build codes and the different between forever loop and on start loop.
In this section we will recap what we have done in the previous day and introduce the new topic of this day to them.
1- We will start by asking the participant to briefly define what is meant by wearable technology.
2- Then we will introduce to them what we are going to do in this day.
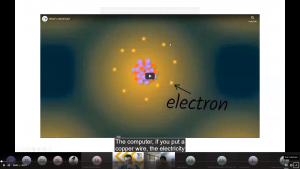
3- We will start by introducing what is electricity. 
4- Then we will ask them whether the electricity is generated or found in nature.
“Most of the participant will say its already found in nature”
When we ask them to explain why it’s found in nature they will say that we are taking it from the Sun and the wind.
(Here we need just to correct their understanding that electricity is generated and what they are mentioning is the energy forms where we change the light energy comes out from the Sun into another form which is Electricity also the movement energy form the wind to Electrical energy)

5- Then we will explain the circuit for the participant by describing how devices works and how electricity flow from the sources to the loads.
6- Then we will present a video to them describing what is the circuit.

7- Then we will briefly define what is meant by switches as the part used to open and close the circuit. 
8- Then we will give some examples about some circuits implanted in clothes.

In this section we will introduce computers in order to understand the Microcontrollers.
1- We will start by defining the computer and the uses of the computer.

2- Then we will briefly define what is meant by microcontrollers, “as miniature computers with restricted abilities”.

3- Then we will present a video describing what is meant by MCU.

4- Then we will give some examples for MCU boards.


In this section we will define and describe what is meant by programming and coding.
1- Firstly we will define what is meant by software in order to understand how the MCU works.
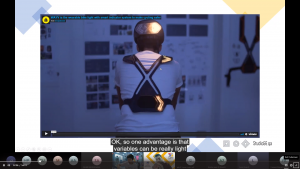
“As software is the way of writing instructions so the MCU will go through these instruction step by step in order to perform the needed cost”

2- Then we will distinguish the difference between the block coding and the text coding.

3- Text coding is the professional way to code as its the faster way.

4- Block coding is the starting point to learn to code as it looks like pictures contain instructions and its about sorting these pictures to perform the needed task.

5- If the statement is found in every code almost. And it’s built upon conditions so when the condition is true the content of the statement will be performed.
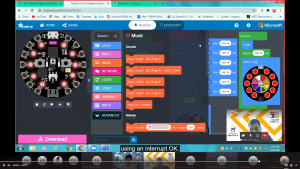
In addition to this we will discuss what is meant by interrupt as it looks like the if statement, but it will have a priority of performing in the code.
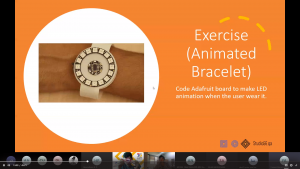
In this section we will make an exercise on Adafruit Platform.
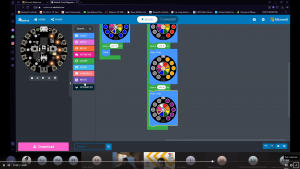
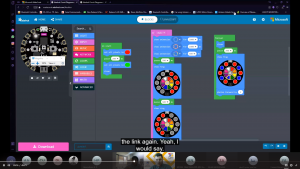
1- We will make an animated bracelet using Circuit Express Playground.

2- We will go Step By Step doing the code on the platform.
3- We will start by the on start loop by adding initialized lights as the device is started.

4- Then we build the forever loop to let the bracelet make animation all the time.

5- Then we will build the on shake code as an interrupt function in the board but in real it’s not.


6- So the bracelet looks like a watch when we shake it, it will make animation.
In this section we will recap the previous days and introduce what we will be doing in this day.
1- We will start by a quick review about what we did in the previous days by:
2- Then we will start by introducing the human senses.
3- We will ask the participant about the senses we have, and why do we need these senses?
“Most of the participant will correctly answer this question; as we have sight, hearing, touch, smell, and taste senses. We need these senses to interact with the surrounding environment”
4- Then we will reflect the reason of having the 5 senses into why MCU needs sensors and the definition of sensors. “As they are devices connected to MCU to collect data from the surrounding and send it to the MCU for further analysis as the user program”

5- Then we will present a video for them about sensors.

6- Then we will list some sensor example that are used with MCU.

7- Then we will discuss some of these sensors, which is very common in use and also our Adafruit board have.
8- We will start discussing the push button.” Which is a mechanical switch to open the circuit and close it, or we can briefly say it sends a signal to the MCU whether we need to send high or low to the processor”.

9- Then we will discuss the light sensor,” Which is a device able to read the intensity of light and sends this to the MCU”.

10- Then we will discuss the thermal sensor,” As a device that able to read the temperature of the surrounding environment”.

11- Then we will discuss the Accelerometer, “As a device able to read the orientation with the ground”.

In this section we will go through some technology used in fashion helped in the process of developing smart clothes with comfort wearing.
1- We will start by showing the conductive ink and its uses in fashion.
2- The conductive ink is a material looks like the normal ink but with conducting abilities which can be added to different types of material.

3- We will show an example uses the conductive ink.


4- Then we will go through the conductive tape,” Which is a flex tap material with conductive abilities and copper look”. This material can be applied to different applications.

In this section we will show the participant the code that we will build in this day to perform a signal indication.
1- We will start by showing the participant the device we built and also recap the concepts we discussed in the previous days.

2- Then we will discuss with them what is meant by transmitter and receiver and what is meant by IR transmission.
3- We will start by coding the transmitter board.
4- firstly the on the start loop, “we will add an initialization animation”.


5- Then we will start coding the forever loop.

6- Then we will code the transmission code to send the data to the receiver side.

7- Then we will code thee receiver side.


In this day we will go through what we delivered in the previous days in brief. then we will introduce the participant to the input and output devices.
1- We will start asking the participant about the IF statement and the loops we were using.
2- Then we will ask the participant about the input devices and what is the function of these devices.
“All of them will state it correctly, as these devices will send the data to the MCU”
3- Then we will ask them about the Output devices and the function of these devices.
“Again, all of them will state it correctly, as output devices are devices takes data from the MCU and show it to the user or interact with the user”.


4- Then we will ask the participant to give examples about input and output devices.
5- Then we will present a video for them to show them what is Input and Output devices.

In this section we will introduce some output devices used with wearable and fashion took advantage from.
1- We will start by discussing the LED’s with participant, where it is devices do emit light, and they are widely used in fashion, and mostly they are the key to the look.


2- We will give the participant some example of applications uses LED in fashion.
3- Then we will introduce them to the RGB LED which is a normal 3 LED’s packed in one case and the working principle is upon combining colours (RED, GREEN, BLUE) combining these colours together can produce more than 16 Million Hue of colour.


4- Then we will give some example about RGB LED’s used in fashion.
5- Then we will stage the Loudspeaker for them and how it works, as it’s a device that can produce sound waves.


6- Then we will show them how is speakers are integrated in fashion.
7- Then we will introduce them to the NFC (near field communication) Technology where it uses small chips to store information and can be integrated to clothes to store the brand data, or mostly it’s used to protect the cloths from being taken out of the store.


8- Then we will introduce the participant to energy harvesting technology where it’s about integrating some devices in the clothes that convert the heat or the movement into electricity stored in small batteries attached with the clothes to be used later to charge the phone or to power another devices.

In this section we will Step By Step stage the instruction regarding using all the sensor are integrated within the board of Adafruit, and also we will use all the output modules integrated in the board.
1- We will start by showing the participant what they will do today.

2- We will use the temperature sensor and light sensor, and we will make animation for each of the read data.

3- After coding the On start to initialize the boating look of the board.
4- Then we will code the forever loop by adding IF statements and the condition for each sensor we want to code.


In this day we will show the participant some projects that can be done using the Adafruit Board.
1- We will start by asking the participant regarding what they have learnt in the previous days.
2- Then we will show the Participant the Boards we had created in the previous days.

3- Then we will go through some projects can be made using the Adafruit Board.

4- This Project is about building a signal indicator for the cyclist were in can be made through Adafruit board.
5- The Next project is about building a health monitor glove able to read the heart rate.

6- Then we will ask the participant to build what ever they want in the Adafruit Platform, but they should describe what they are coding.
Having trouble? Let us know by completing the form below. We'll do our best to get your issues resolved quickly.
"*" indicates required fields