- Loading…
This series of lessons focuses on developing a battery-operated Wi-Fi lamp. The focus is on developing the program mode, particularly controlling an LED strip, and the basics of HTML programming.

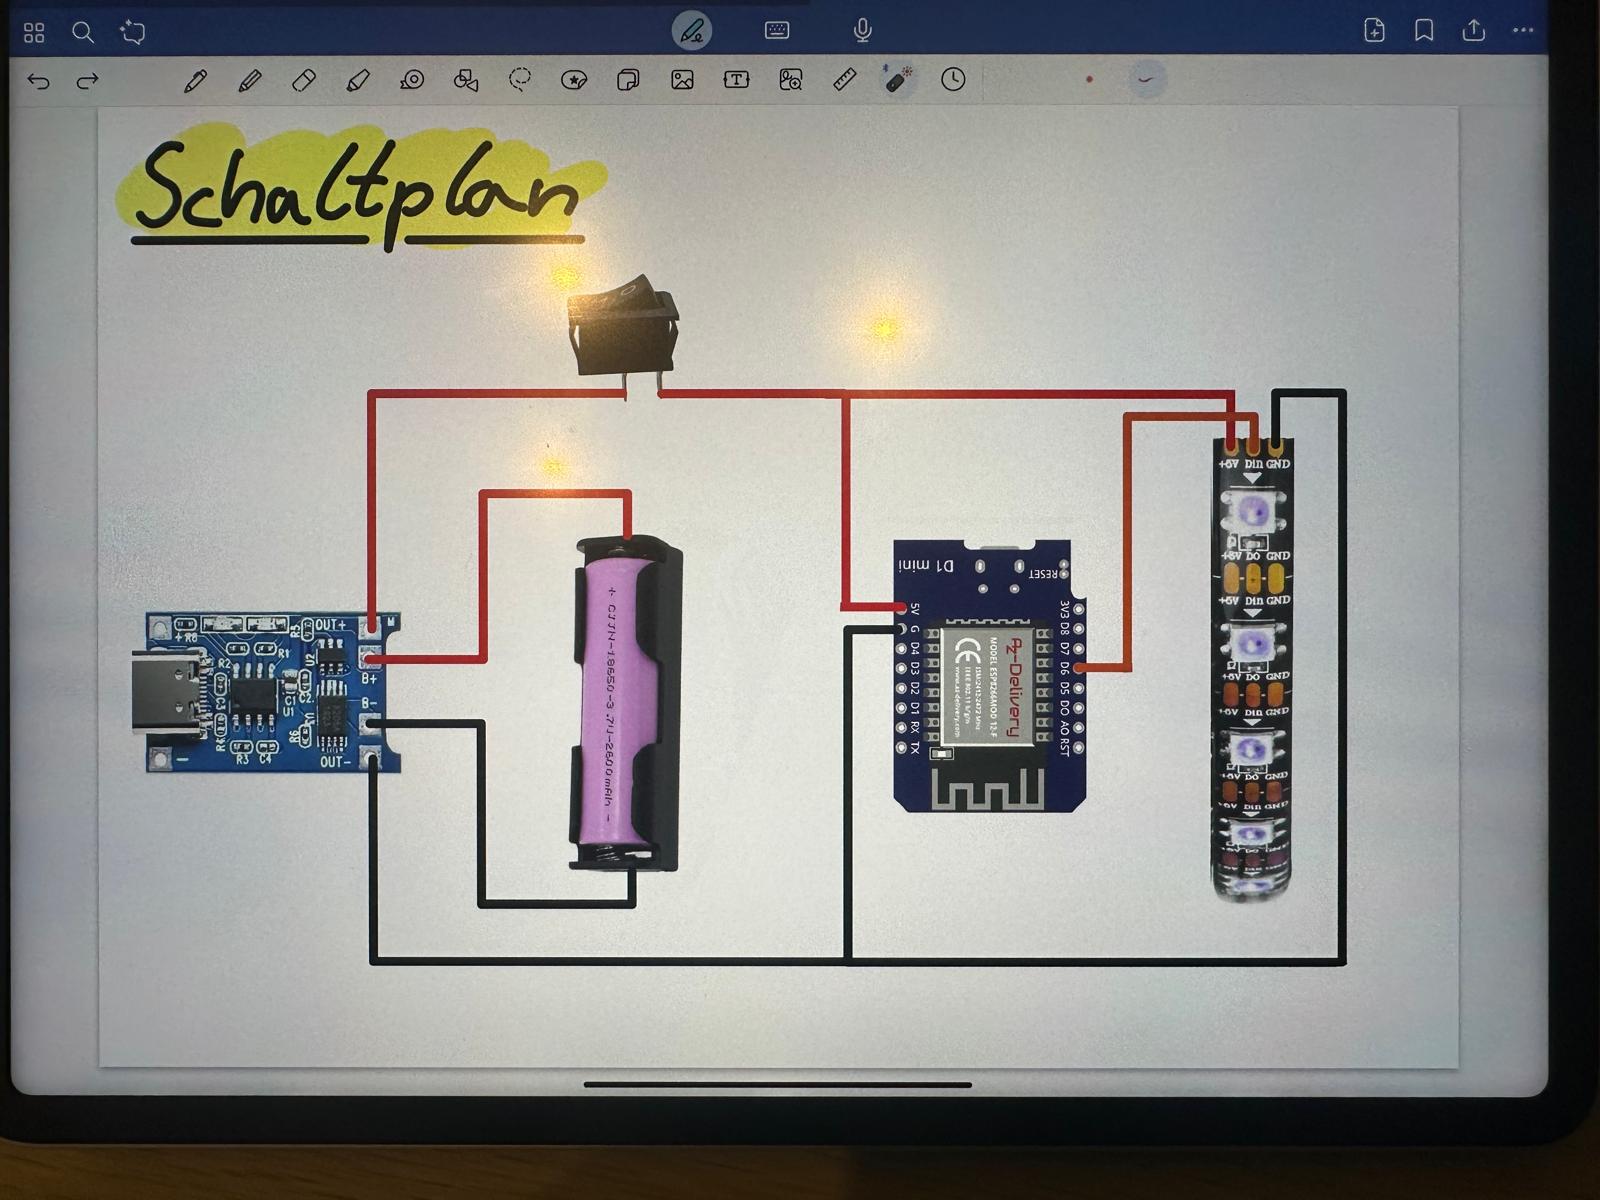
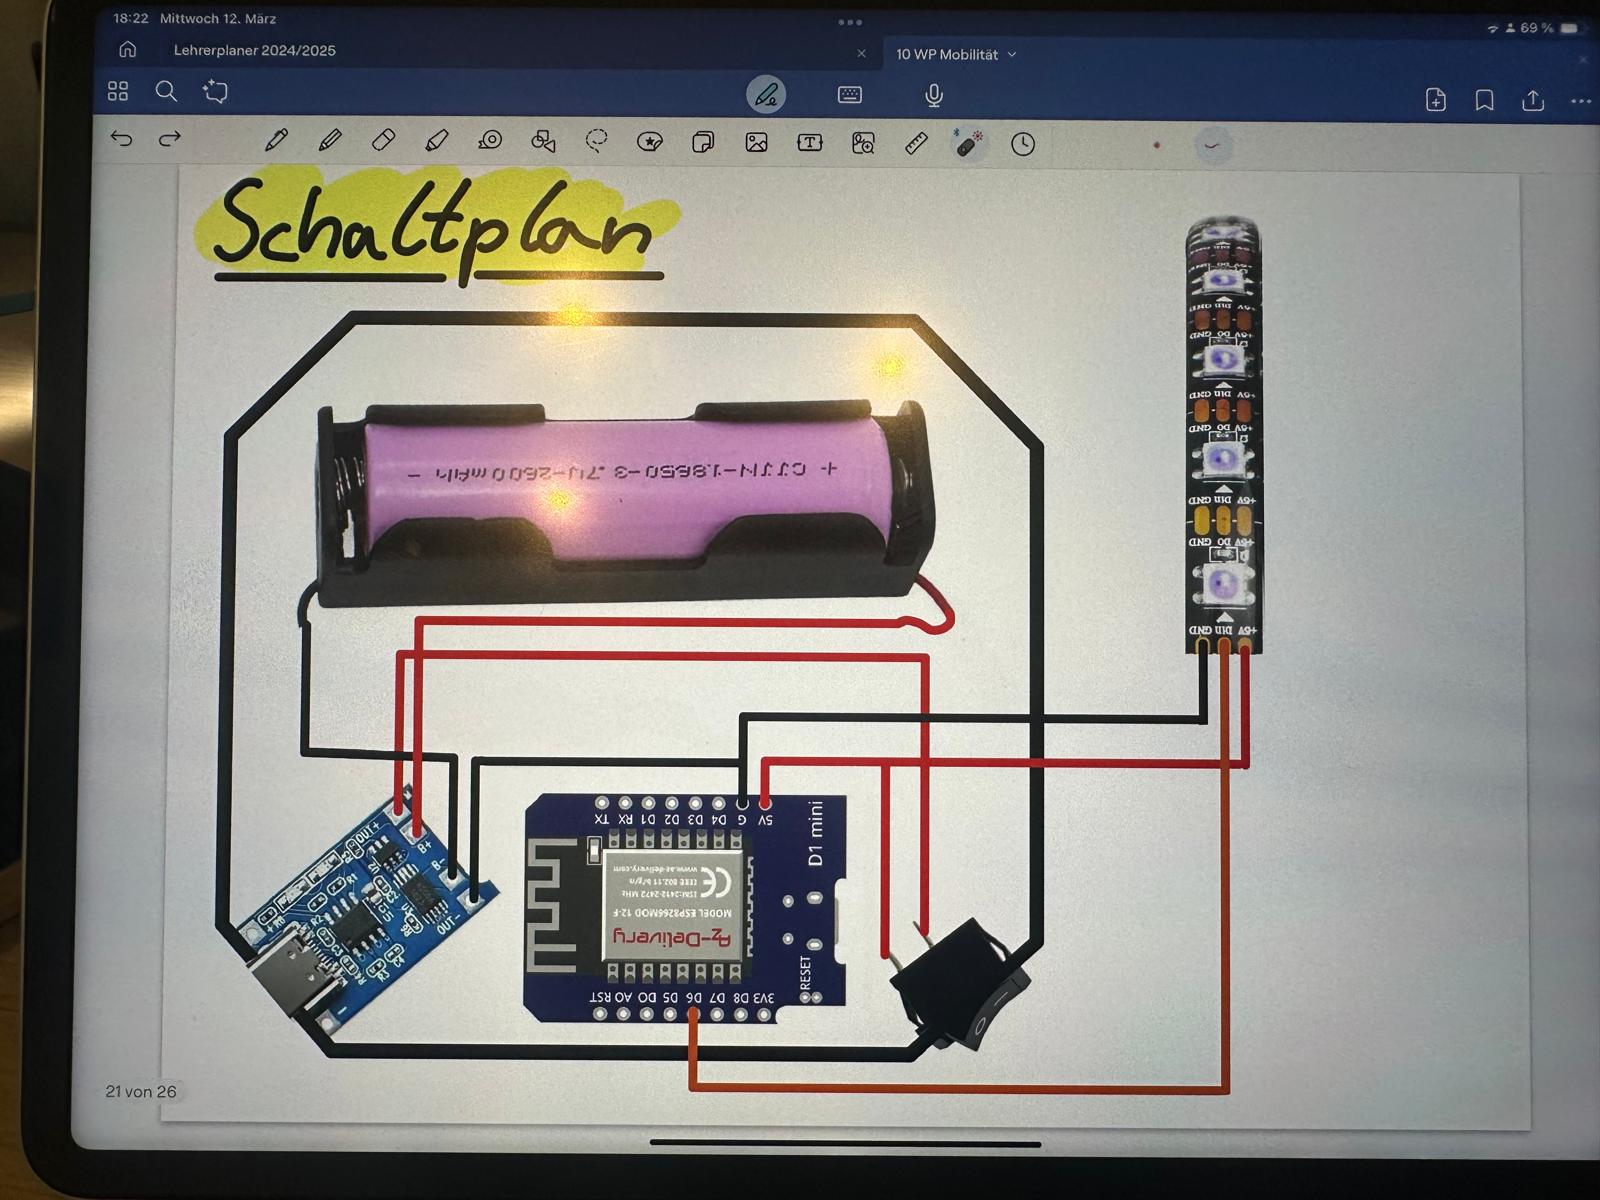
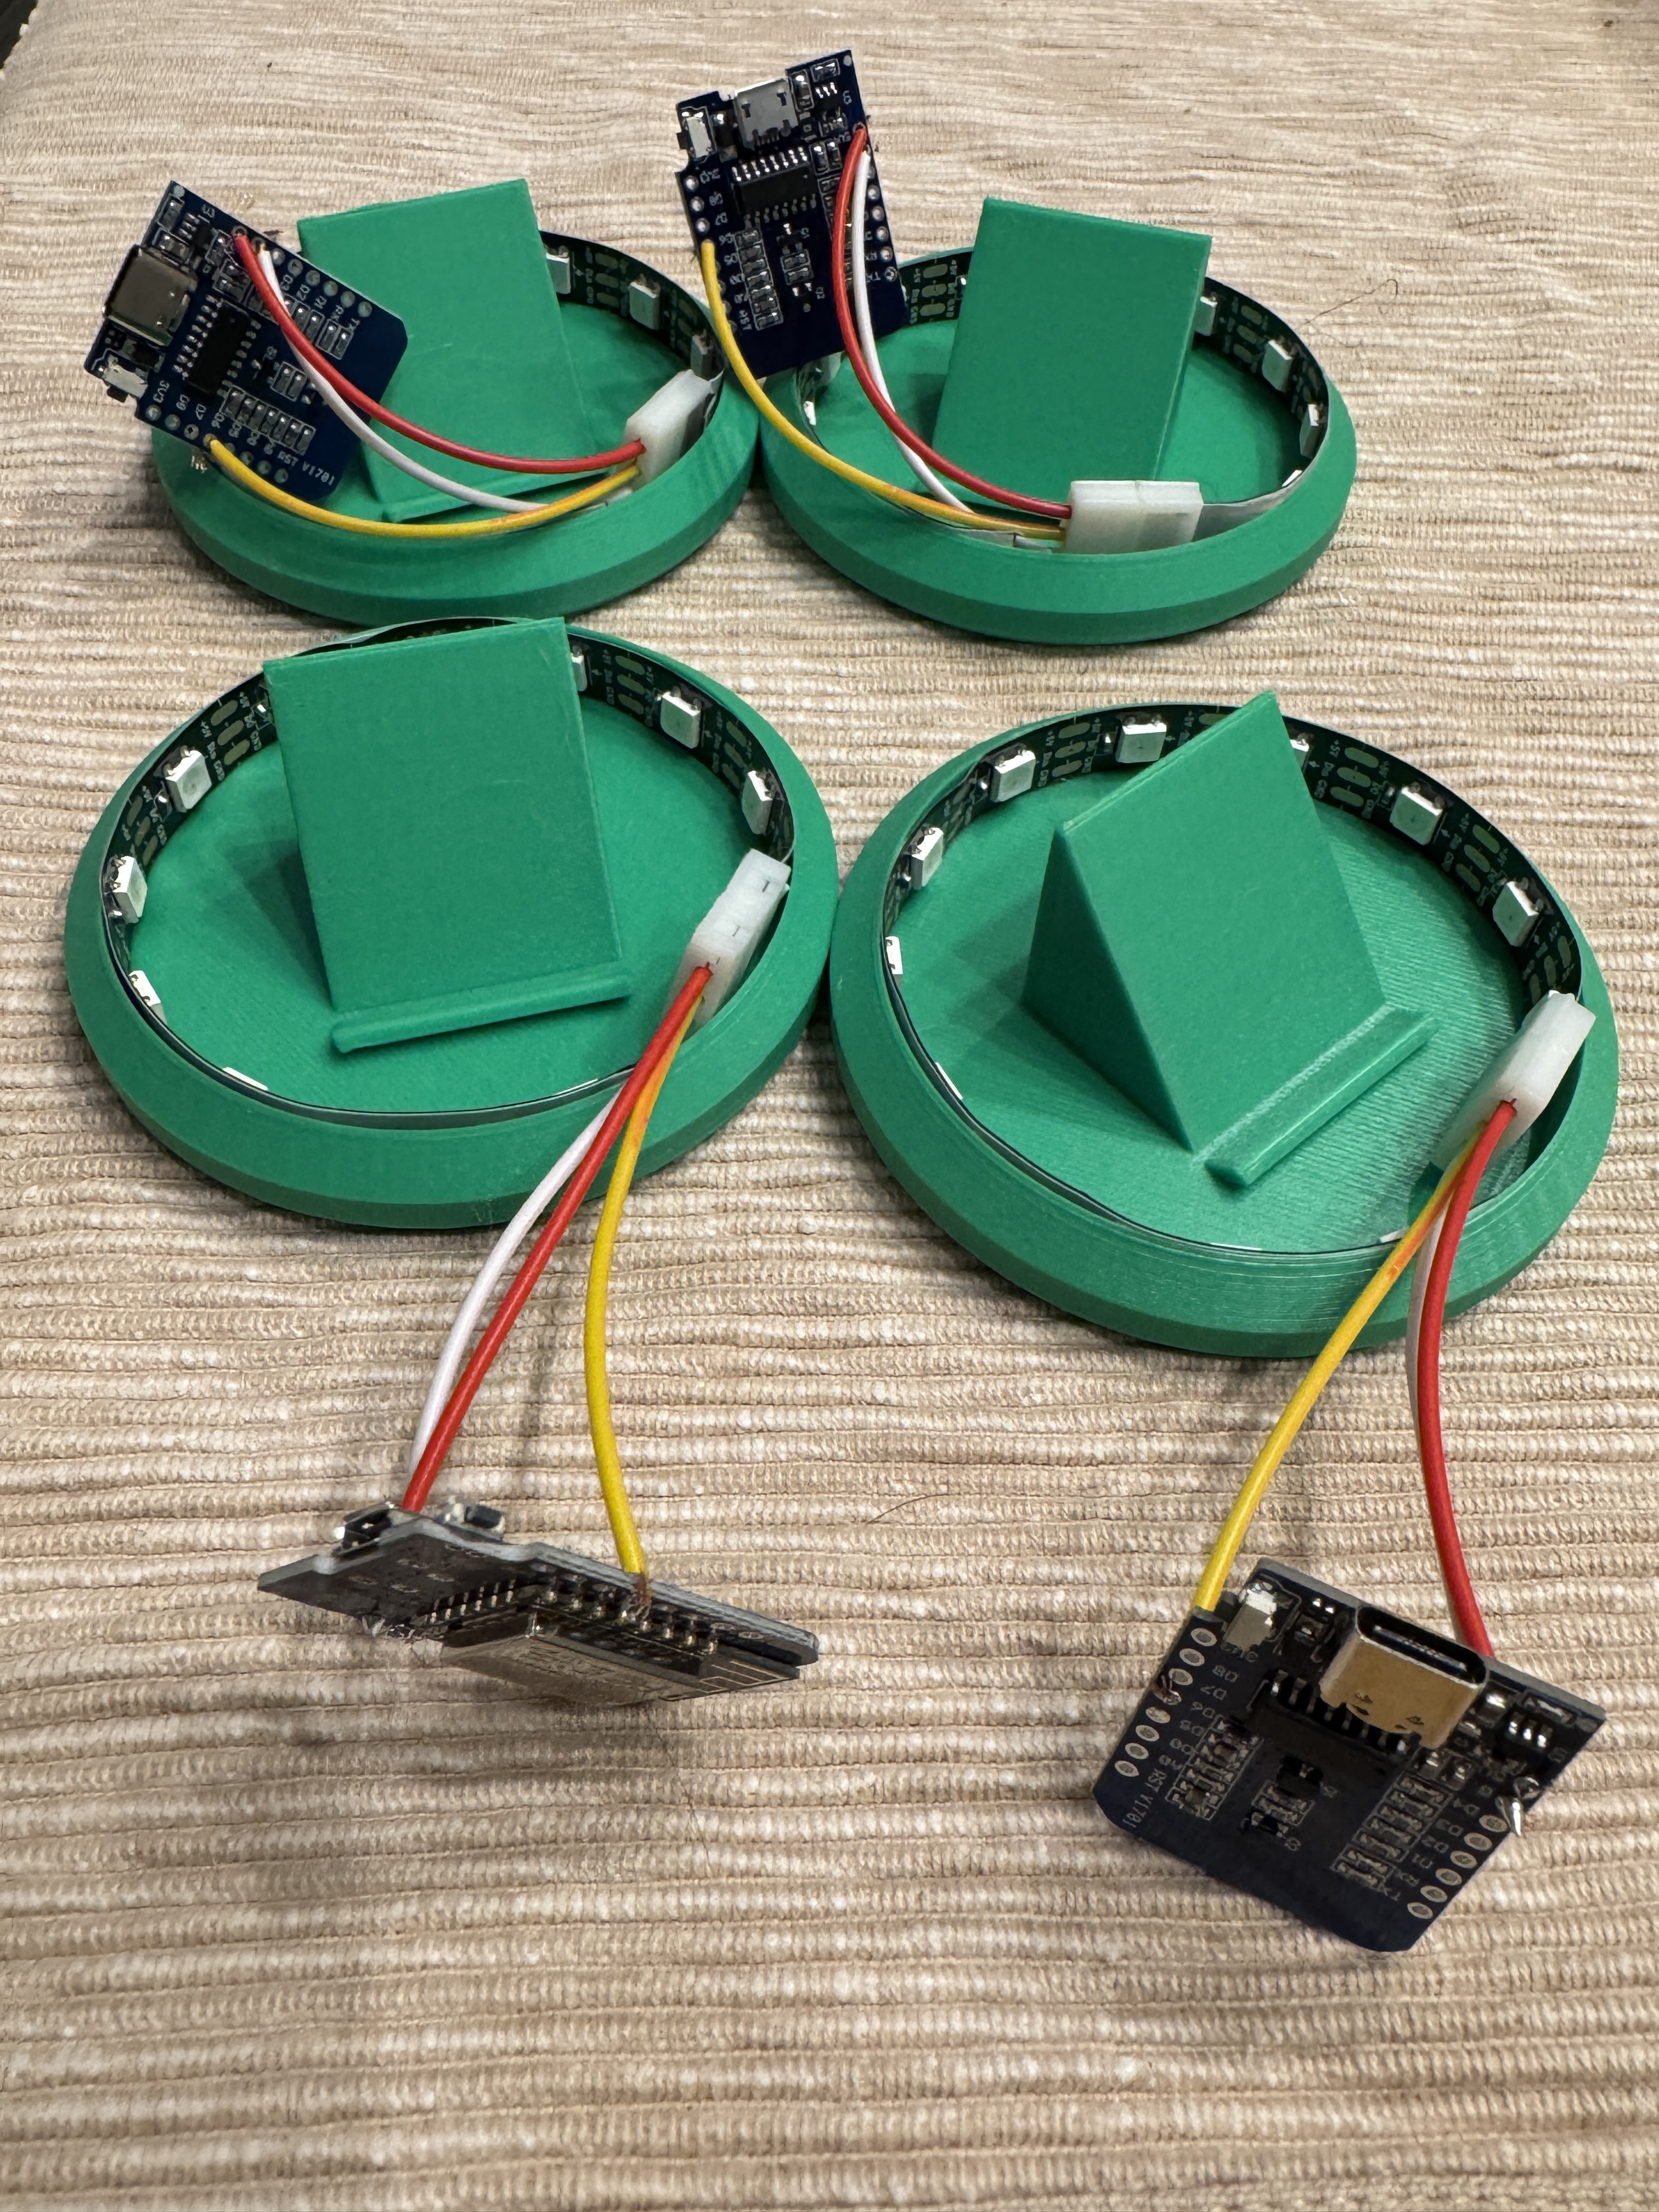
LED-Stripe with 12 LED, ESP8266 WIFI, Switch, USB-C-charger module, recharchable battery, wire, battery-holder, 3d-Printer, PC with Arduino-IDE
Problem-Solving Skills:
Students identify the technical requirements for the project.
Integrating all components into a functional system.
Media Competence:
Understand how IoT technologies are used in practice.
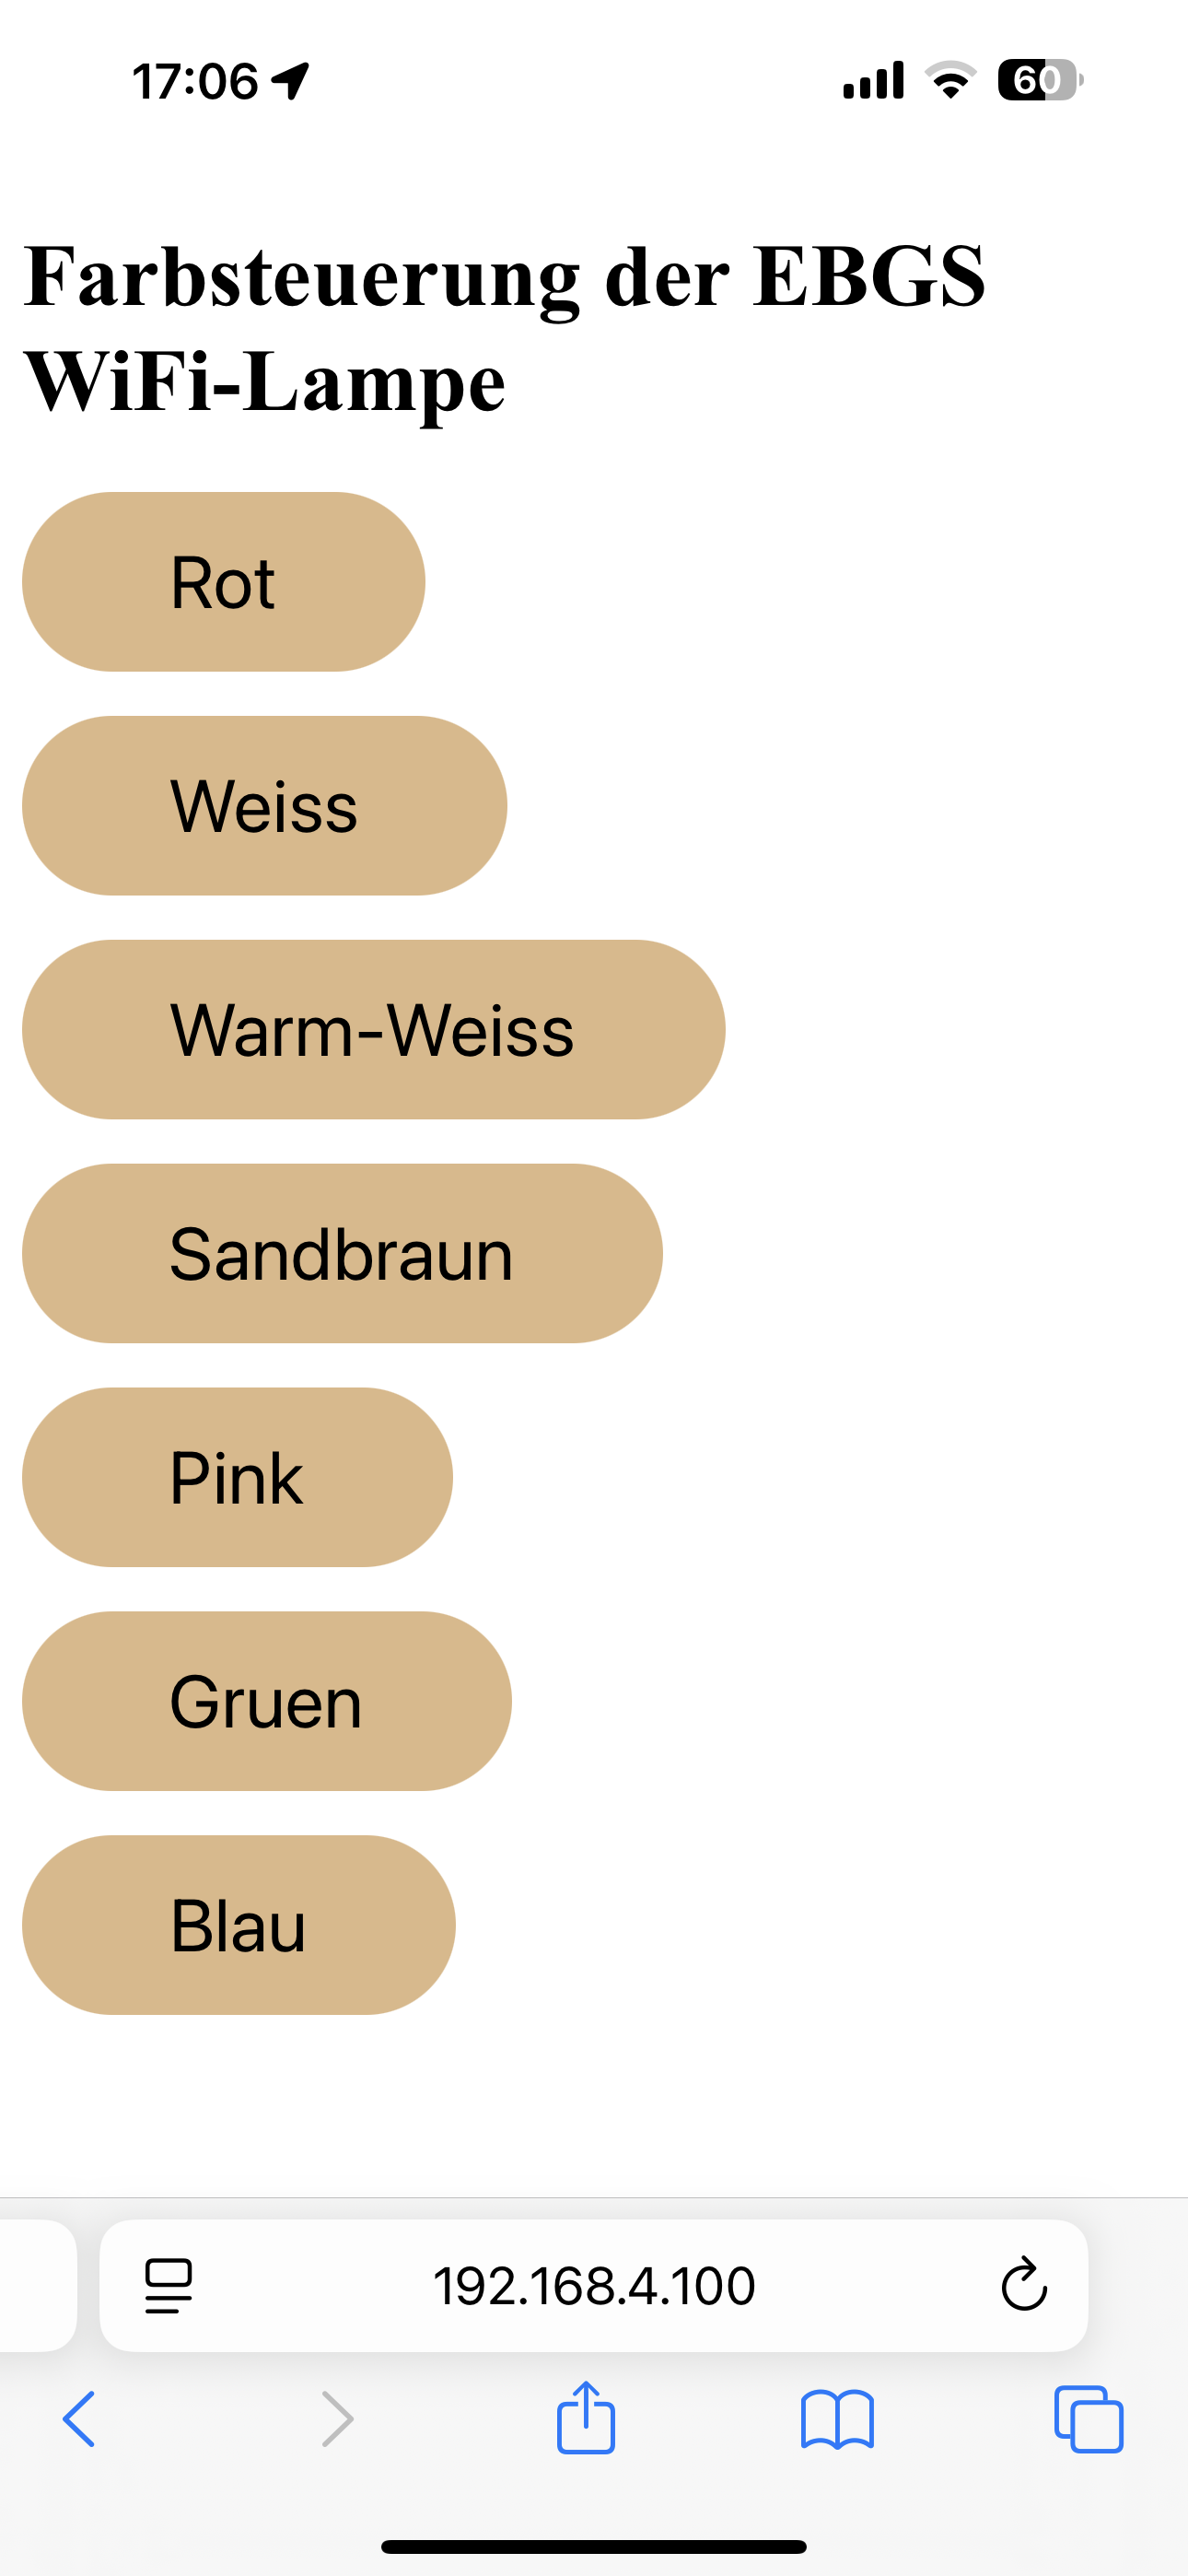
Create a well-structured HTML page to control the lamp.
Design Skills:
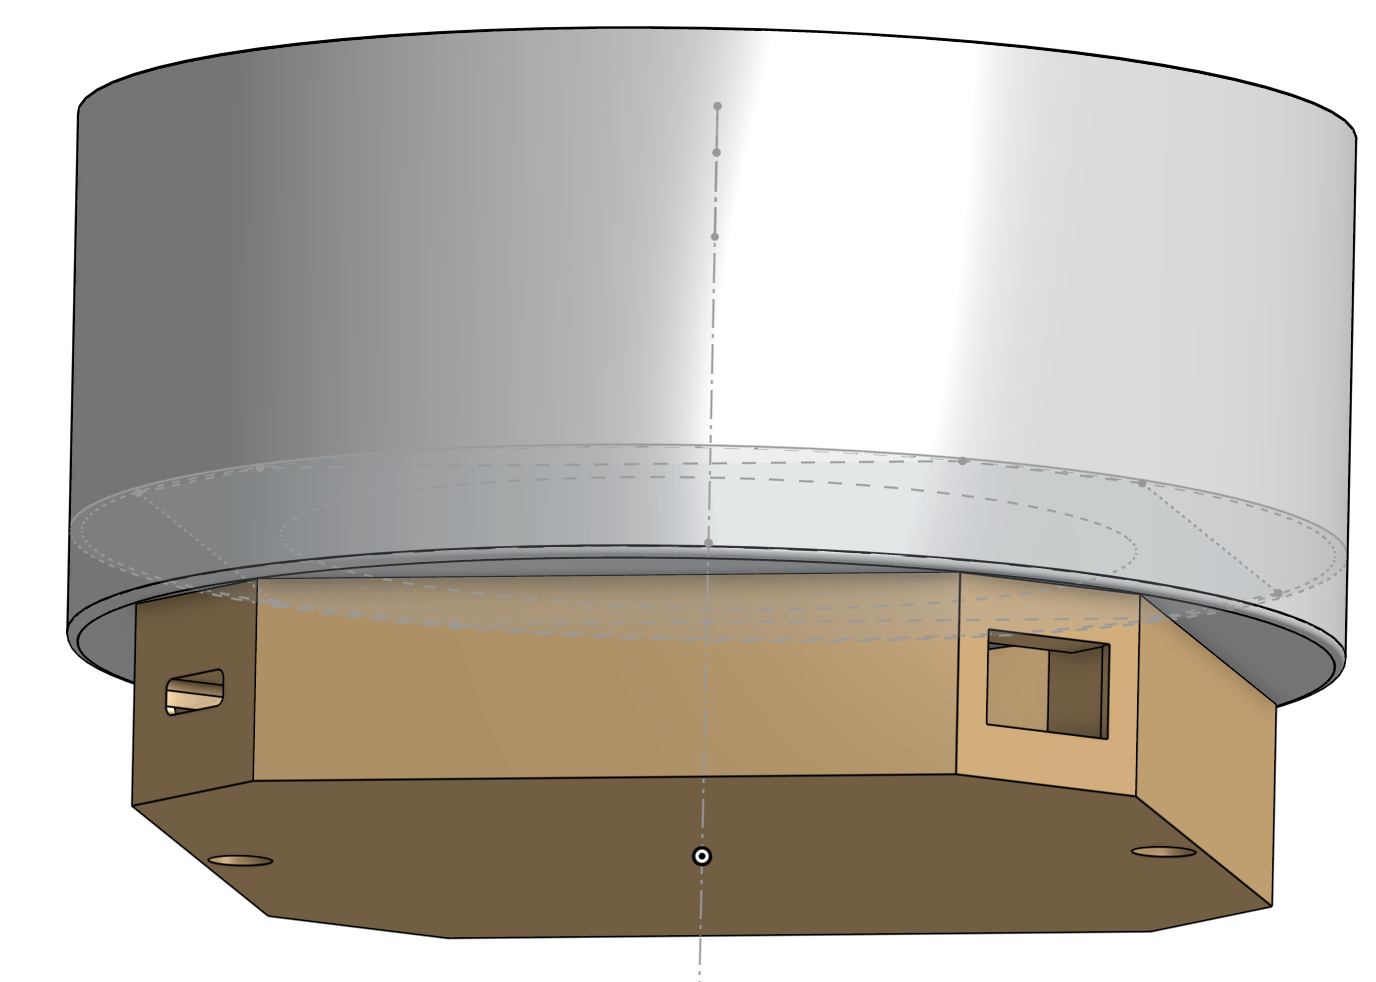
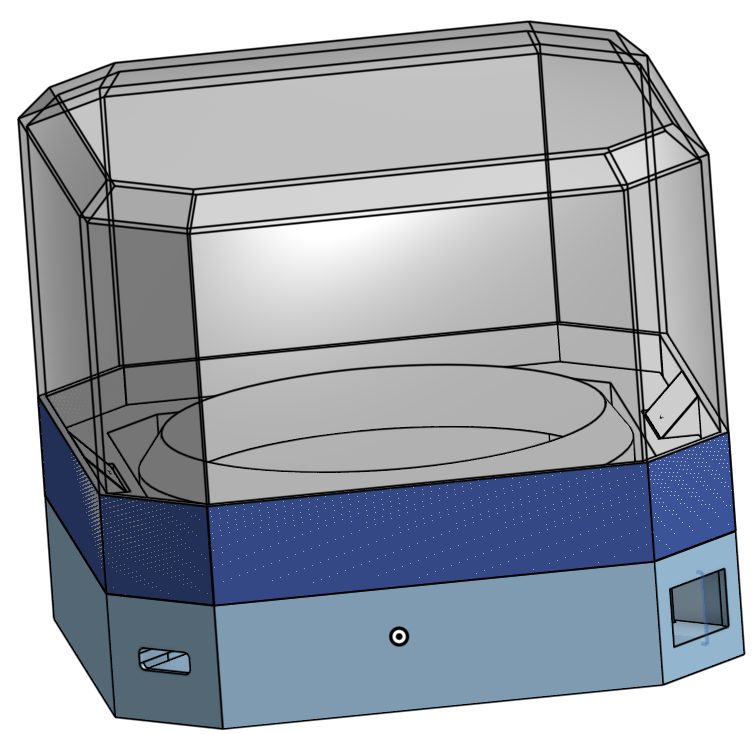
Ability to use CAD software (e.g., Onshape) for creating 3D models.
Programming and Algorithmic Thinking:
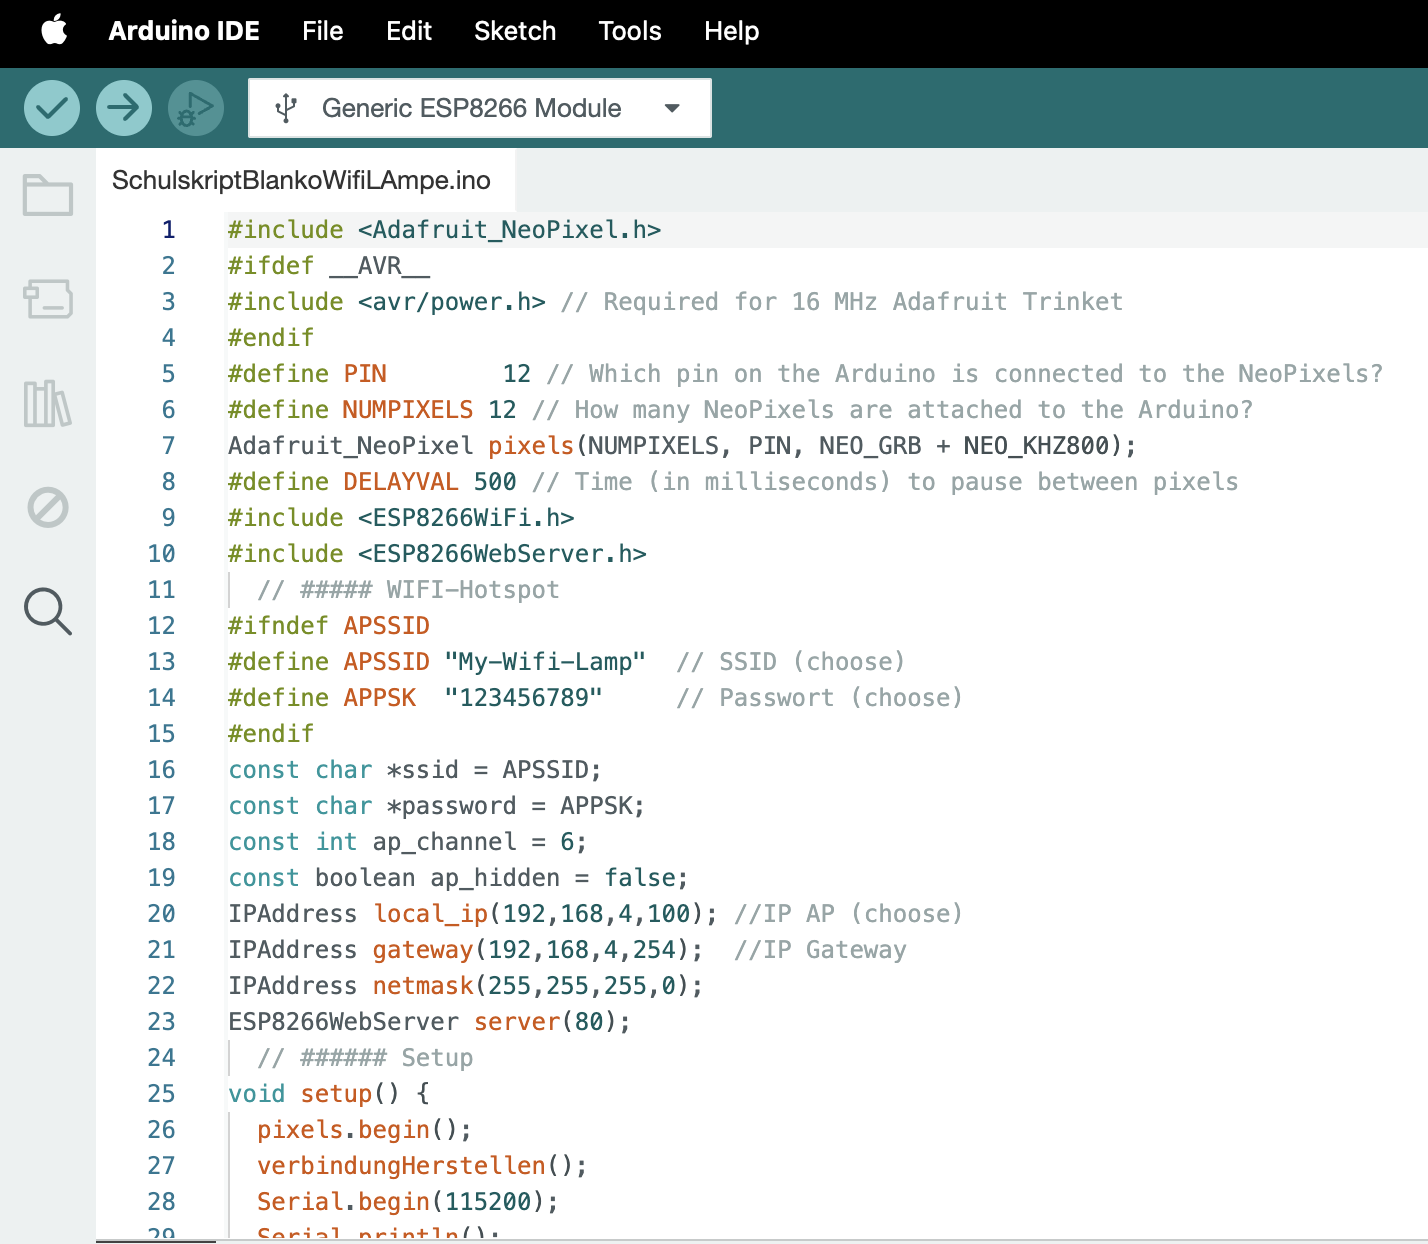
Learn the basics of programming with the Arduino IDE.
Understand the integration of HTML and JavaScript for hardware interaction.
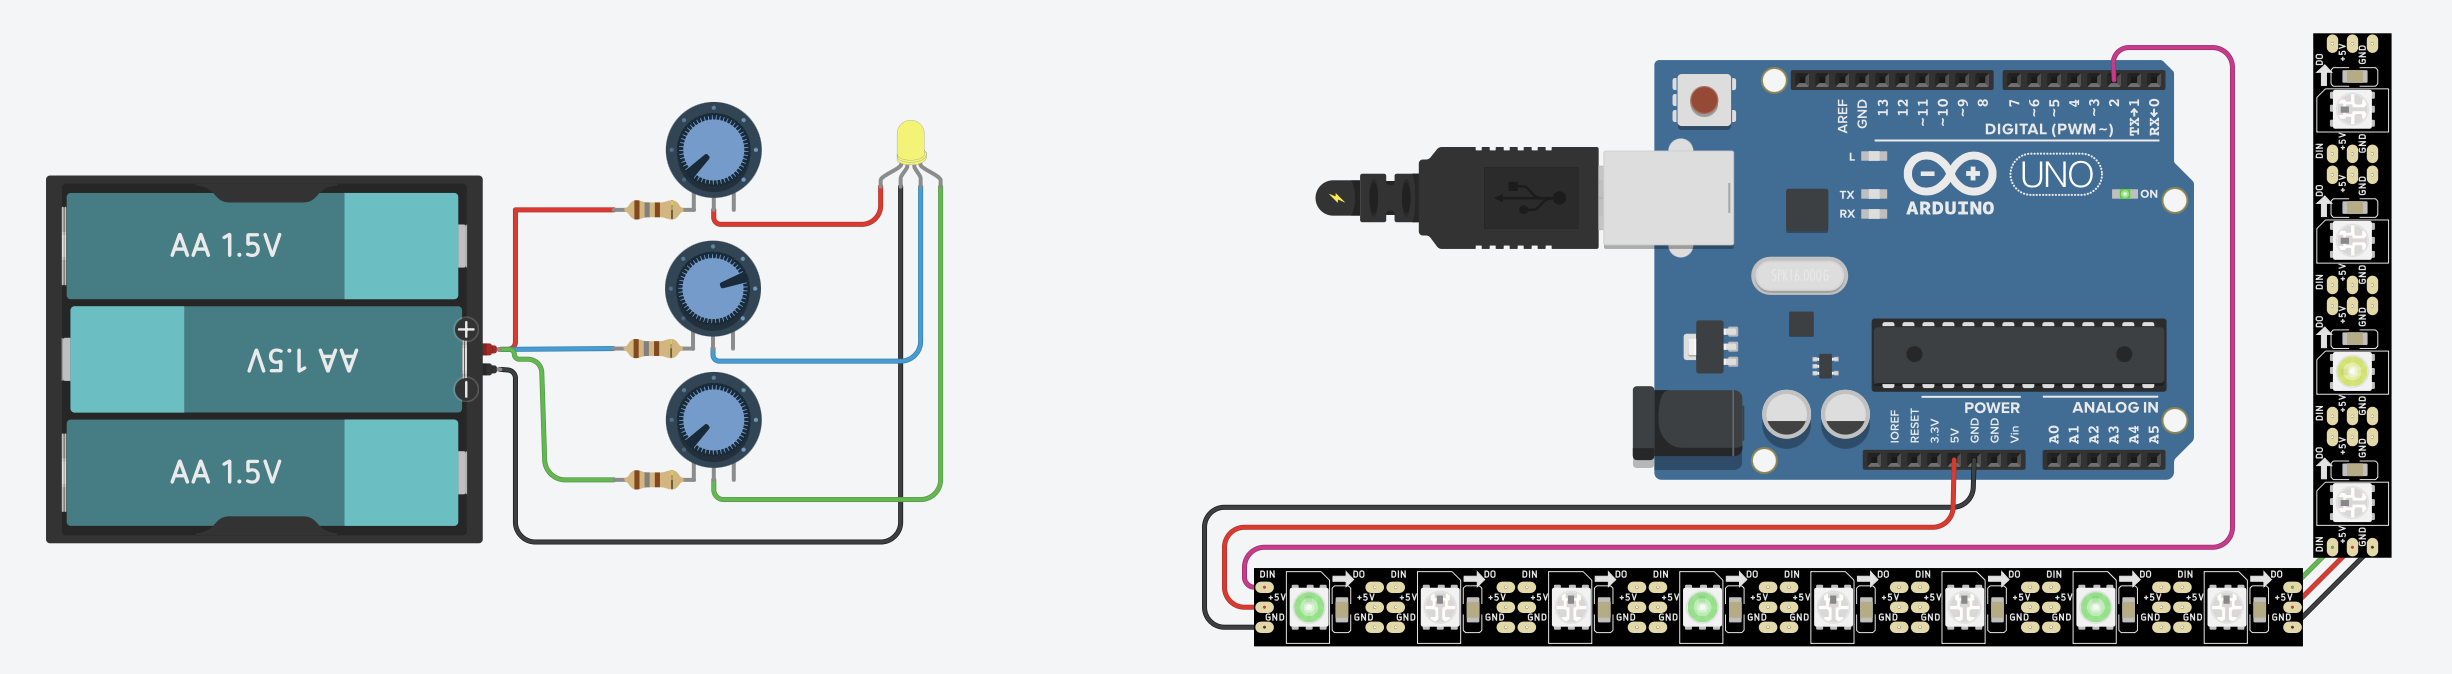
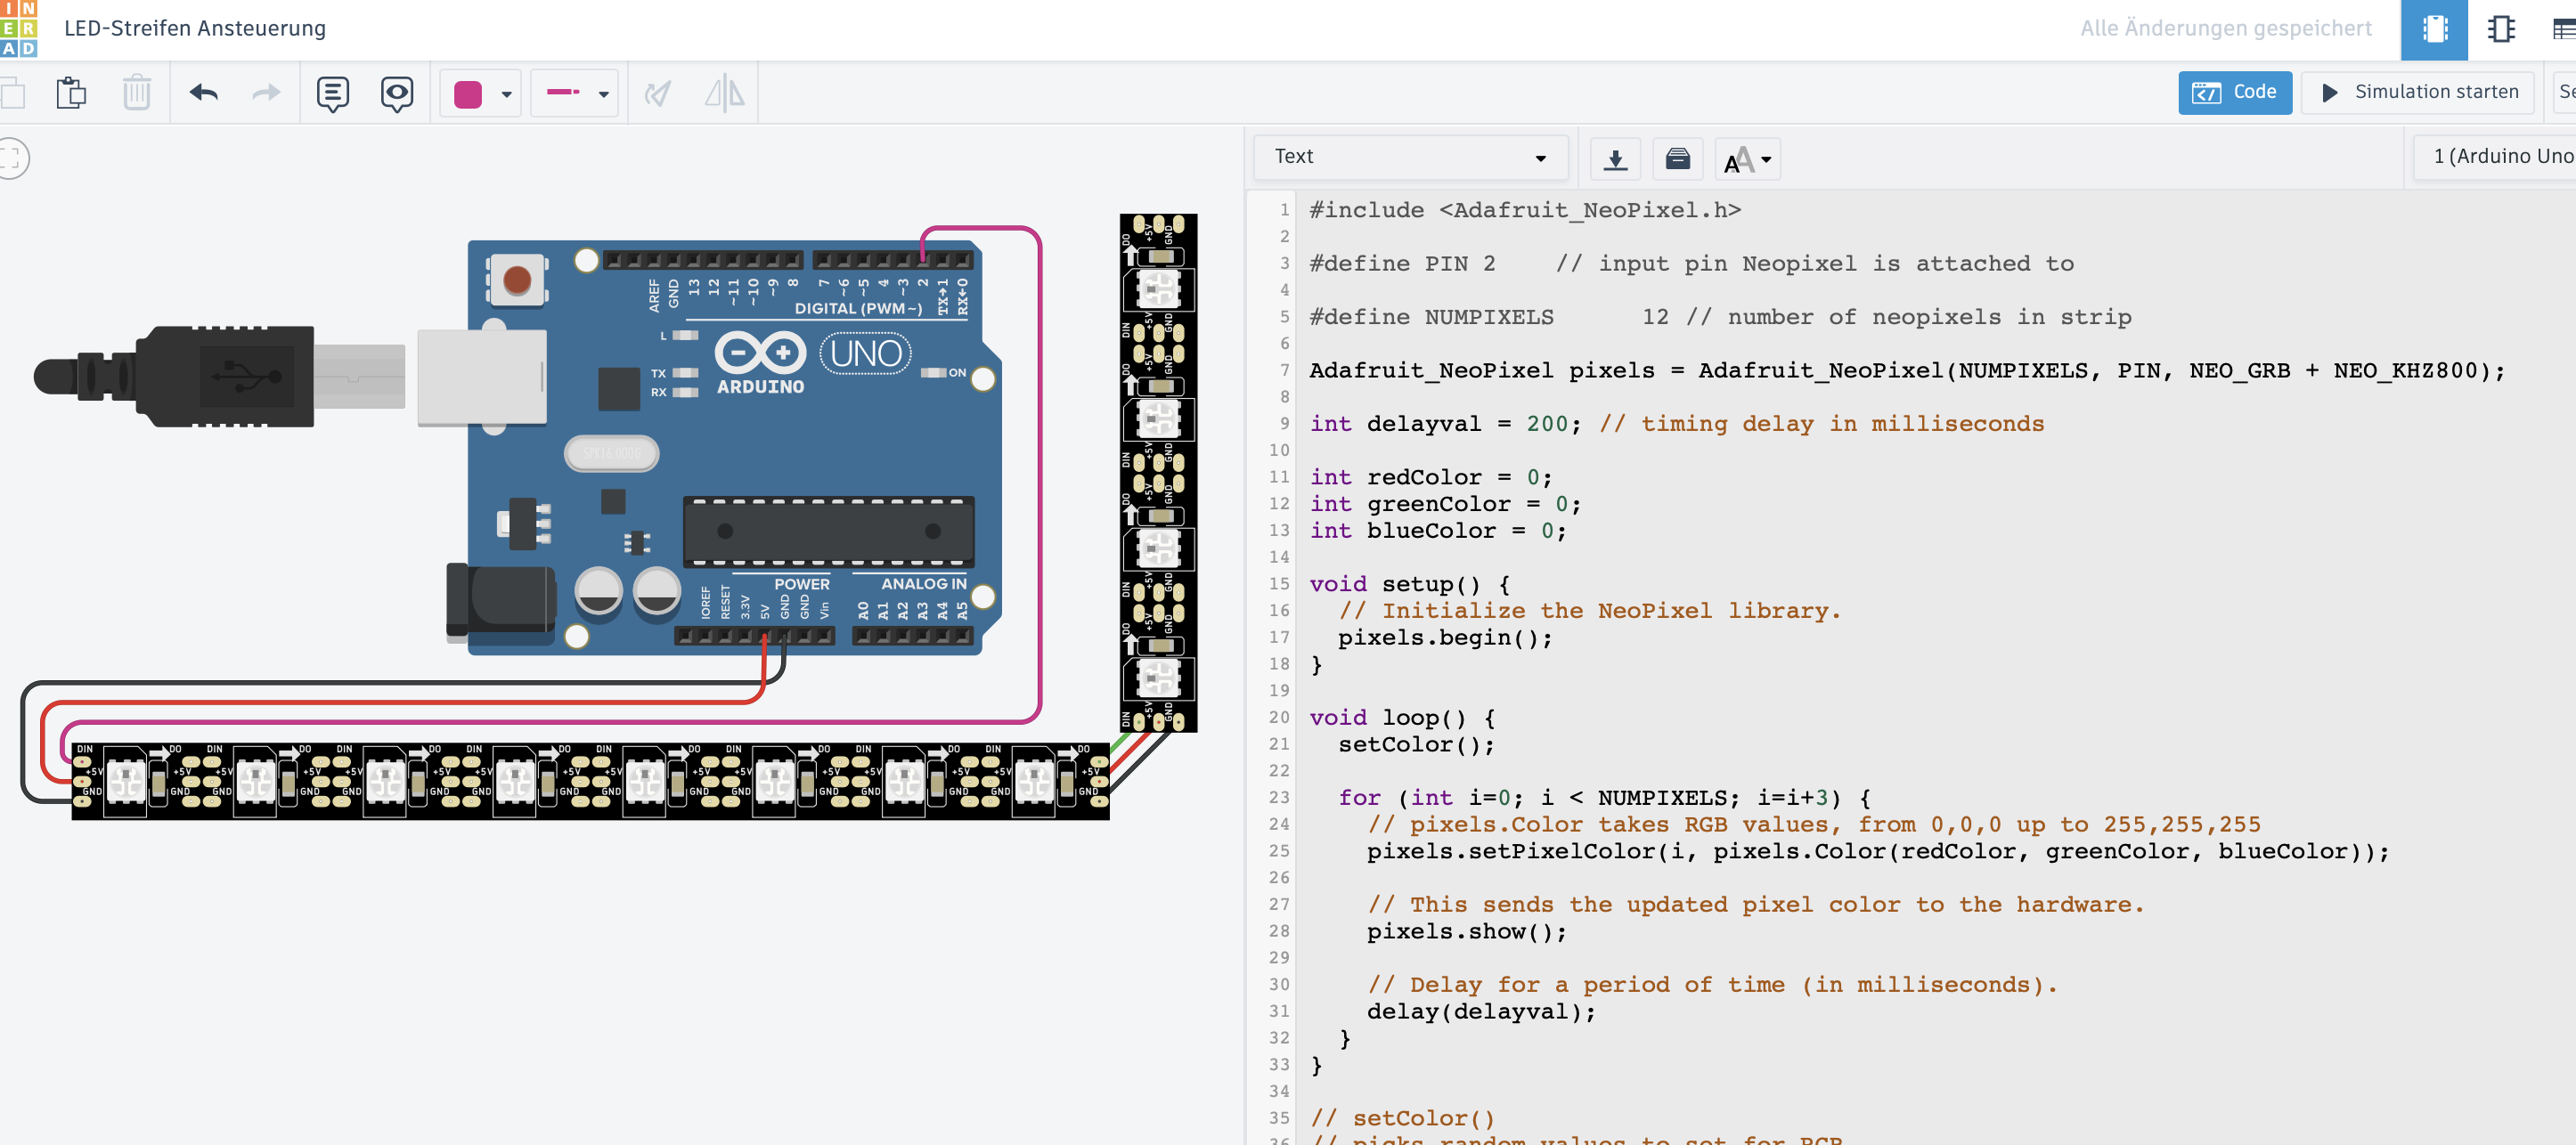
Control the RGB LED strip with different colors and brightness.
Introduction to simple controls using libraries (e.g., FastLED).
Practical Skills:
Acquire knowledge in handling electronic components and soldering techniques.
Presentation Skills:
Ability to present results confidently and reflect on the learning process.
Reflection:
Think about what has been learned and identify areas for improvement.
It has been shown that students can largely independently implement the production of the WIFI lamp with the help of instructional videos and worksheets. The focus is on developing the program code. Variants are possible that focus on the 3D construction of the housing or the design of the lamp’s functionality. Numerous other learning opportunities arise, e.g., the color mixing system, the principle of controlling LEDs using arrays, etc.
Project objective: Creating a functional and aesthetic controllable lamp. Introduction to technical components: ESP8266, LED strip, 3D-printed housing. Overview of basic concepts such as WLAN and IoT.
Presentation of the project idea through a video.
Discussion on the possibilities and applications of a WiFi lamp.
Brainstorming session: Collecting initial ideas for the design and functions of the lamp on a flipchart or board.
Introduction to Onshape: User interface, basic tools, and functions. Material selection and design considerations: Light diffusion, geometry.
Presentation of the lamp base and LED holder in Onshape. Discussion of options and conditions for constructing a matching lampshade. Creation of a simple 3D model of a lamp shade in Onshape.
Homework: Sketch your own lamp shade design and implement it in Onshape.
The 3D printing process: Preparation, printing, and post-processing. Advantages and disadvantages of different printing techniques and materials.
Presentation of the printer and materials used.
Printing the Lamp Shade: Transferring the file to the printer and starting the print process.
Discussion on issues that may arise during printing (e.g., warping, adhesion).
Overview of the Arduino IDE: User interface, examples, libraries. Introduction to basic programming concepts: Variables, data types, structures.
Uploading a “Hello World” program to the ESP8266.
Practical Exercise: The first programming task (e.g., blinking an LED).
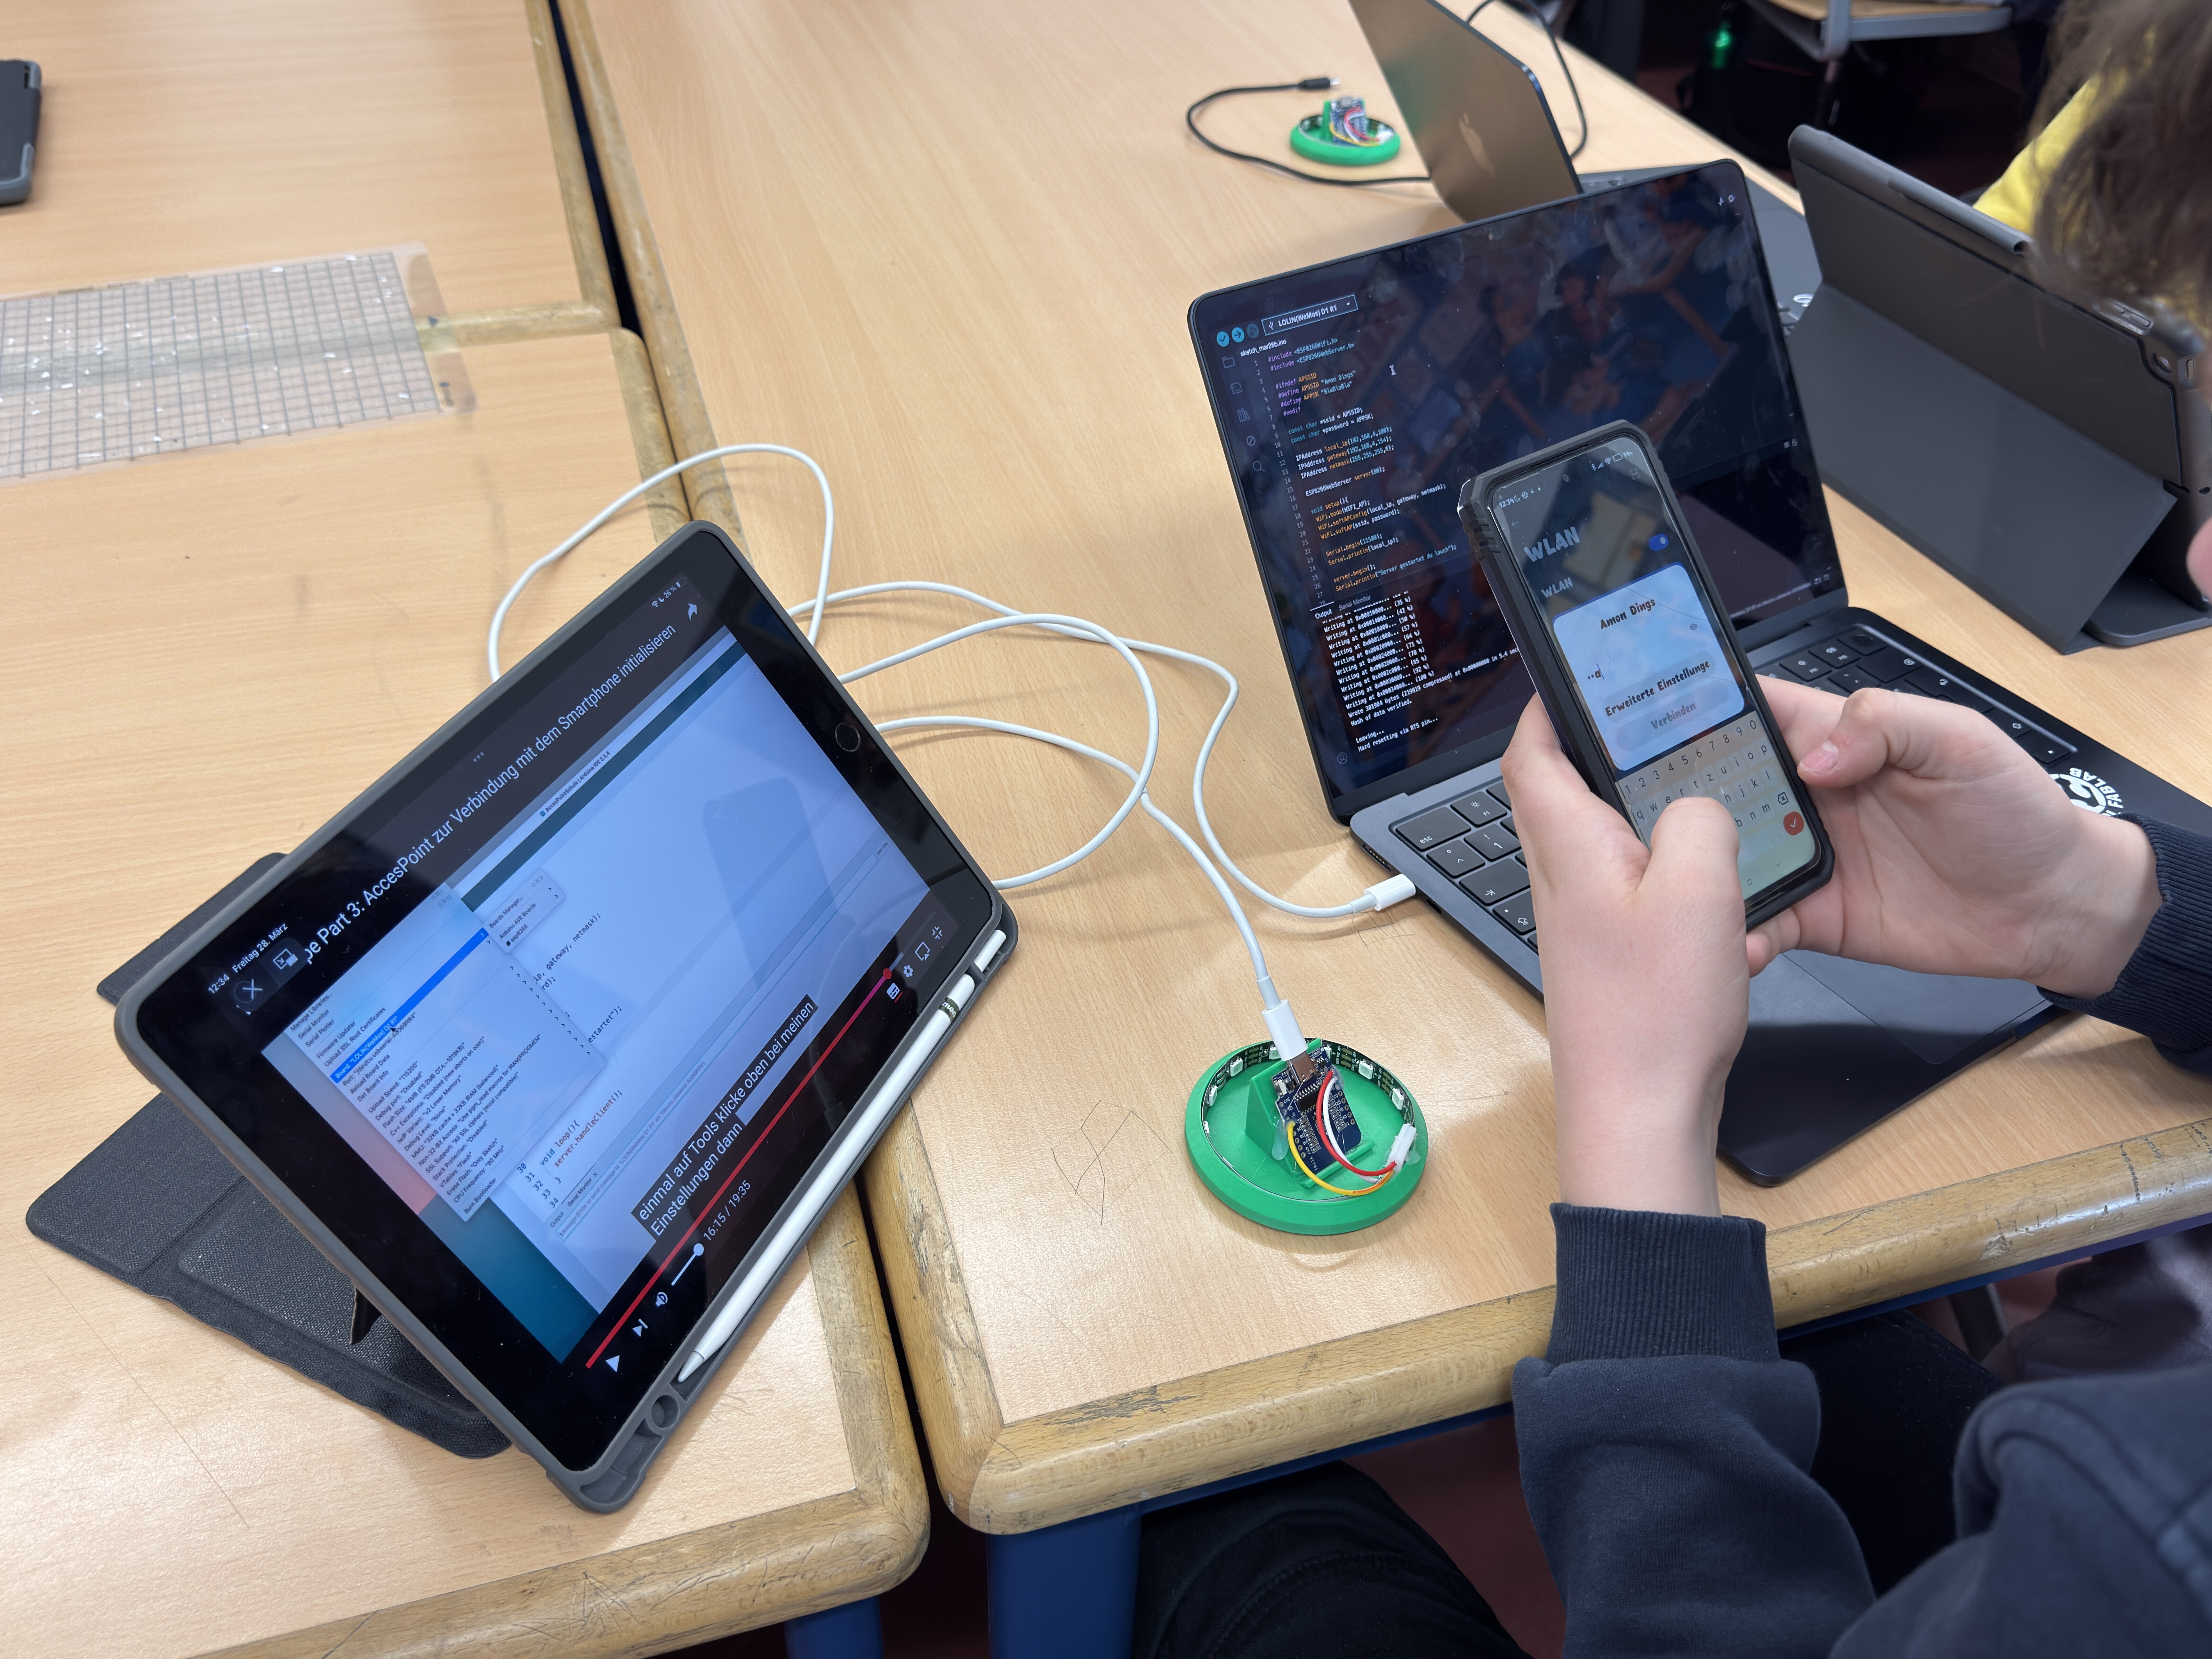
Establish a WIFI connection to the ESP8266, specify an SSID and a password.
Control the RGB LED strip with different colors and brightness. Introduction to simple controls using libraries.
xplanation of LED control and clarification of how a large number of LEDs with different colors can be controlled using a single data cable. Comparison with the conventional control of an RGB LED using three cables per LED with three potentiometers. Collaborative group work to develop the code. Testing and Debugging: Run the code and troubleshoot any errors collaboratively. Document the code and functions used. E
Fundamentals of HTML: Structure and styling of a web application. Utilizing HTML to control the lamp through the user interface.
Teacher-Led Explanation: Build a simple HTML page with descriptive elements (buttons, colors). Practical Exercise: Implement the web app with basic functions for lamp control (e.g., turning on/off, color changing). Testing and adjusting the user interface.
Safety precautions and techniques for soldering. Mechanical assembly of electrical components in the 3D housing.
Set up a soldering station: Students practice soldering wires and connections.
Assemble the lamp: Install the ESP8266, switch, USB-C-connector LED strip, and battery.
Functionality tests: Check electrical connections.
Presentation of the completed lamp and discussion about design choices and functions.
Each group presents their lamp, explaining the programming and its functions.
Feedback session: What went well, and what can be improved?
Project documentation: Students write a brief report on their experiences.
Having trouble? Let us know by completing the form below. We'll do our best to get your issues resolved quickly.
"*" indicates required fields