- Loading…

Design Challenge: Design and build a lamp/light with non-addressable LEDs and an on/off switch. Constraints:
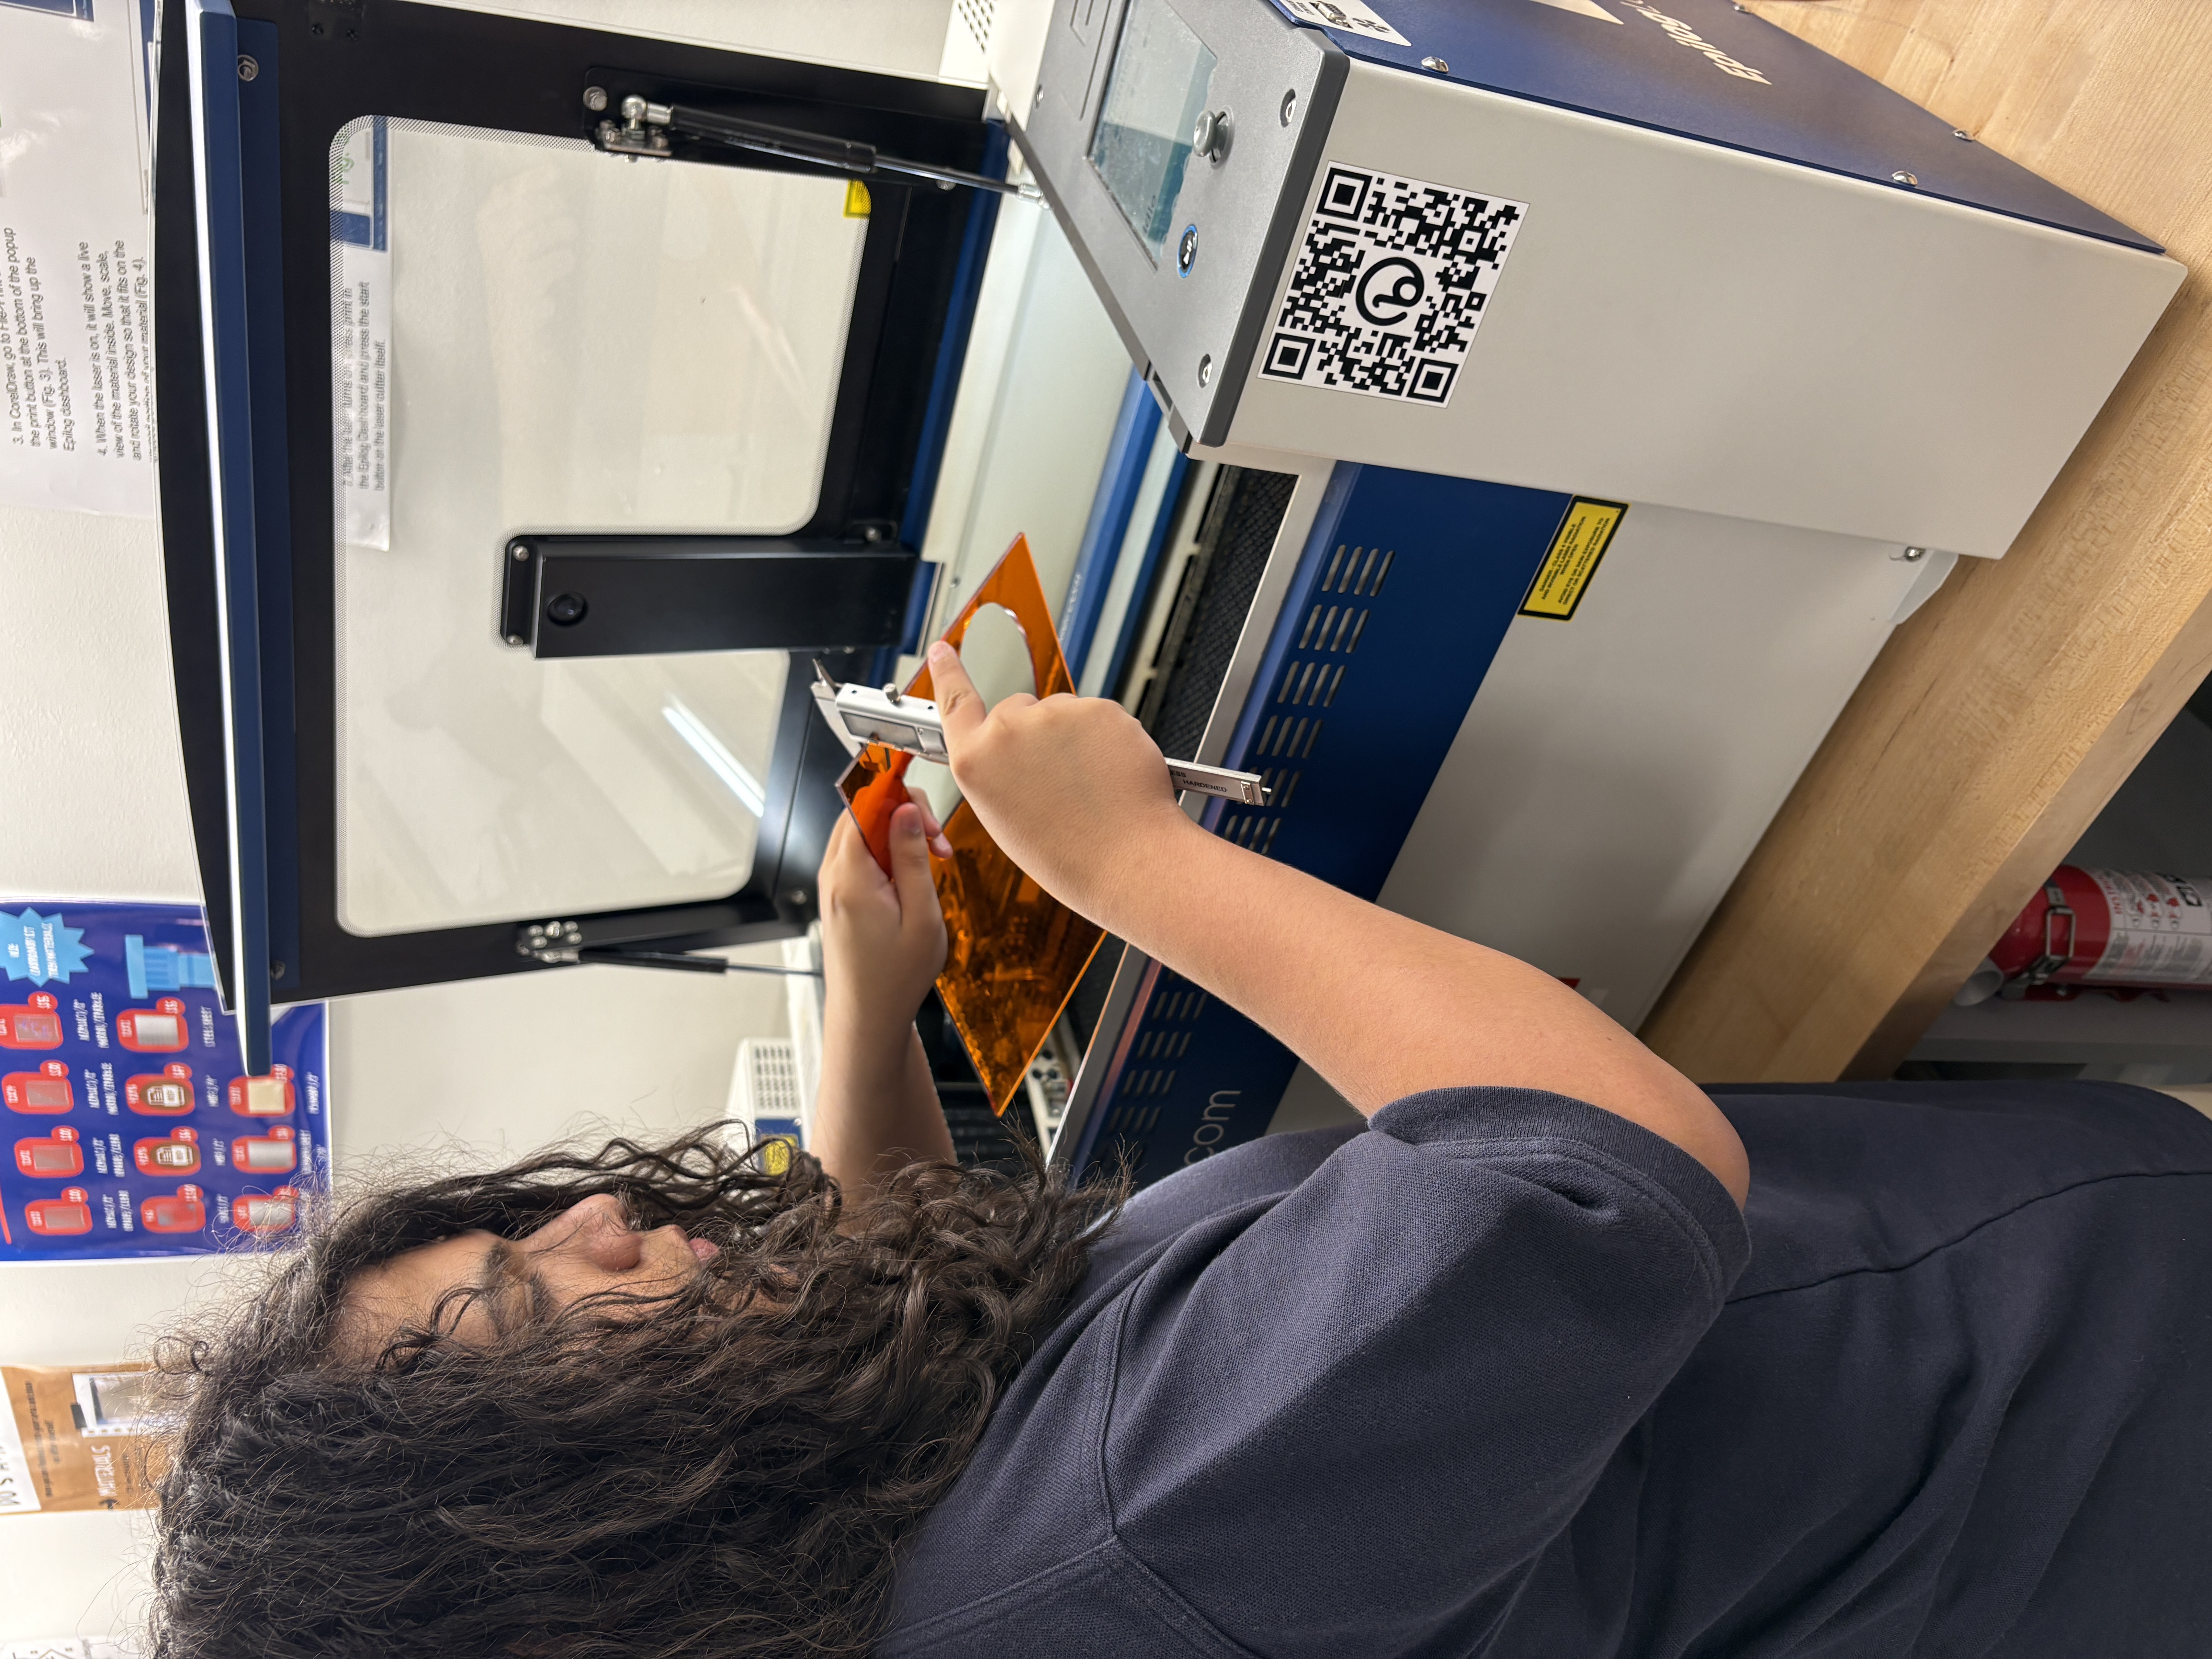
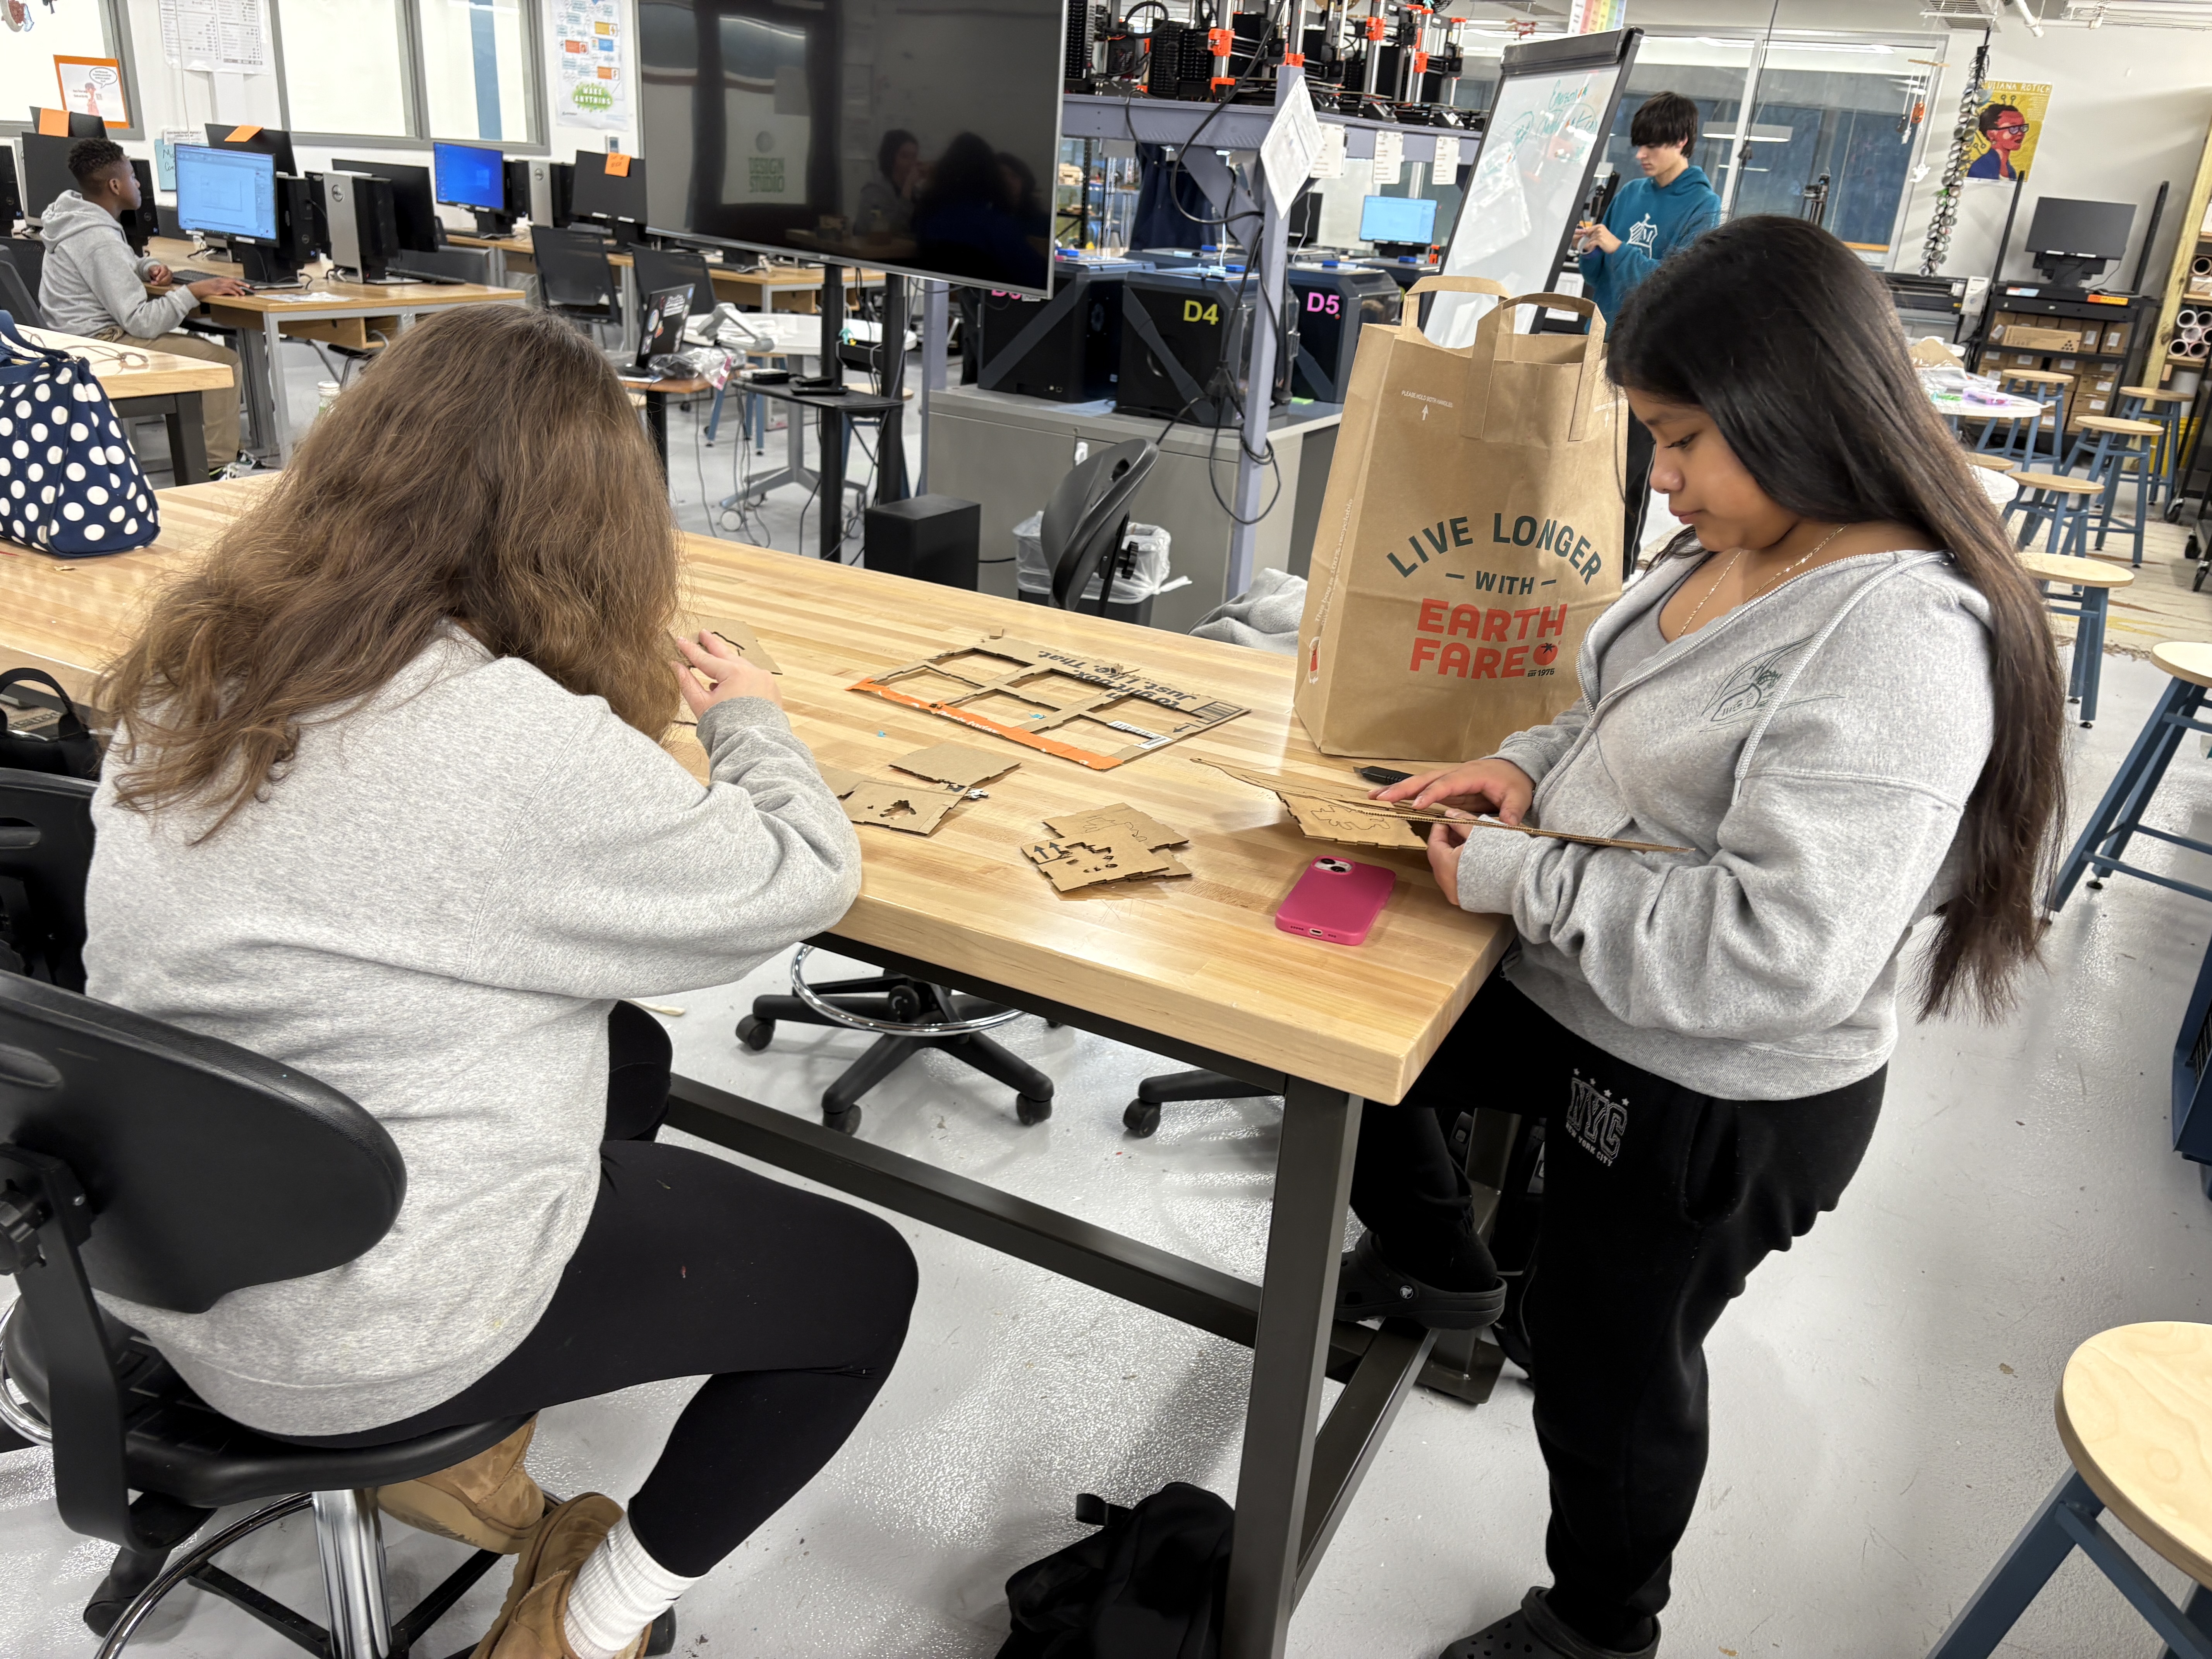
Design and laser cut the body of the lamp
Use a non-addressable LED light strip, 3V battery pack, and a switch in your lamp.
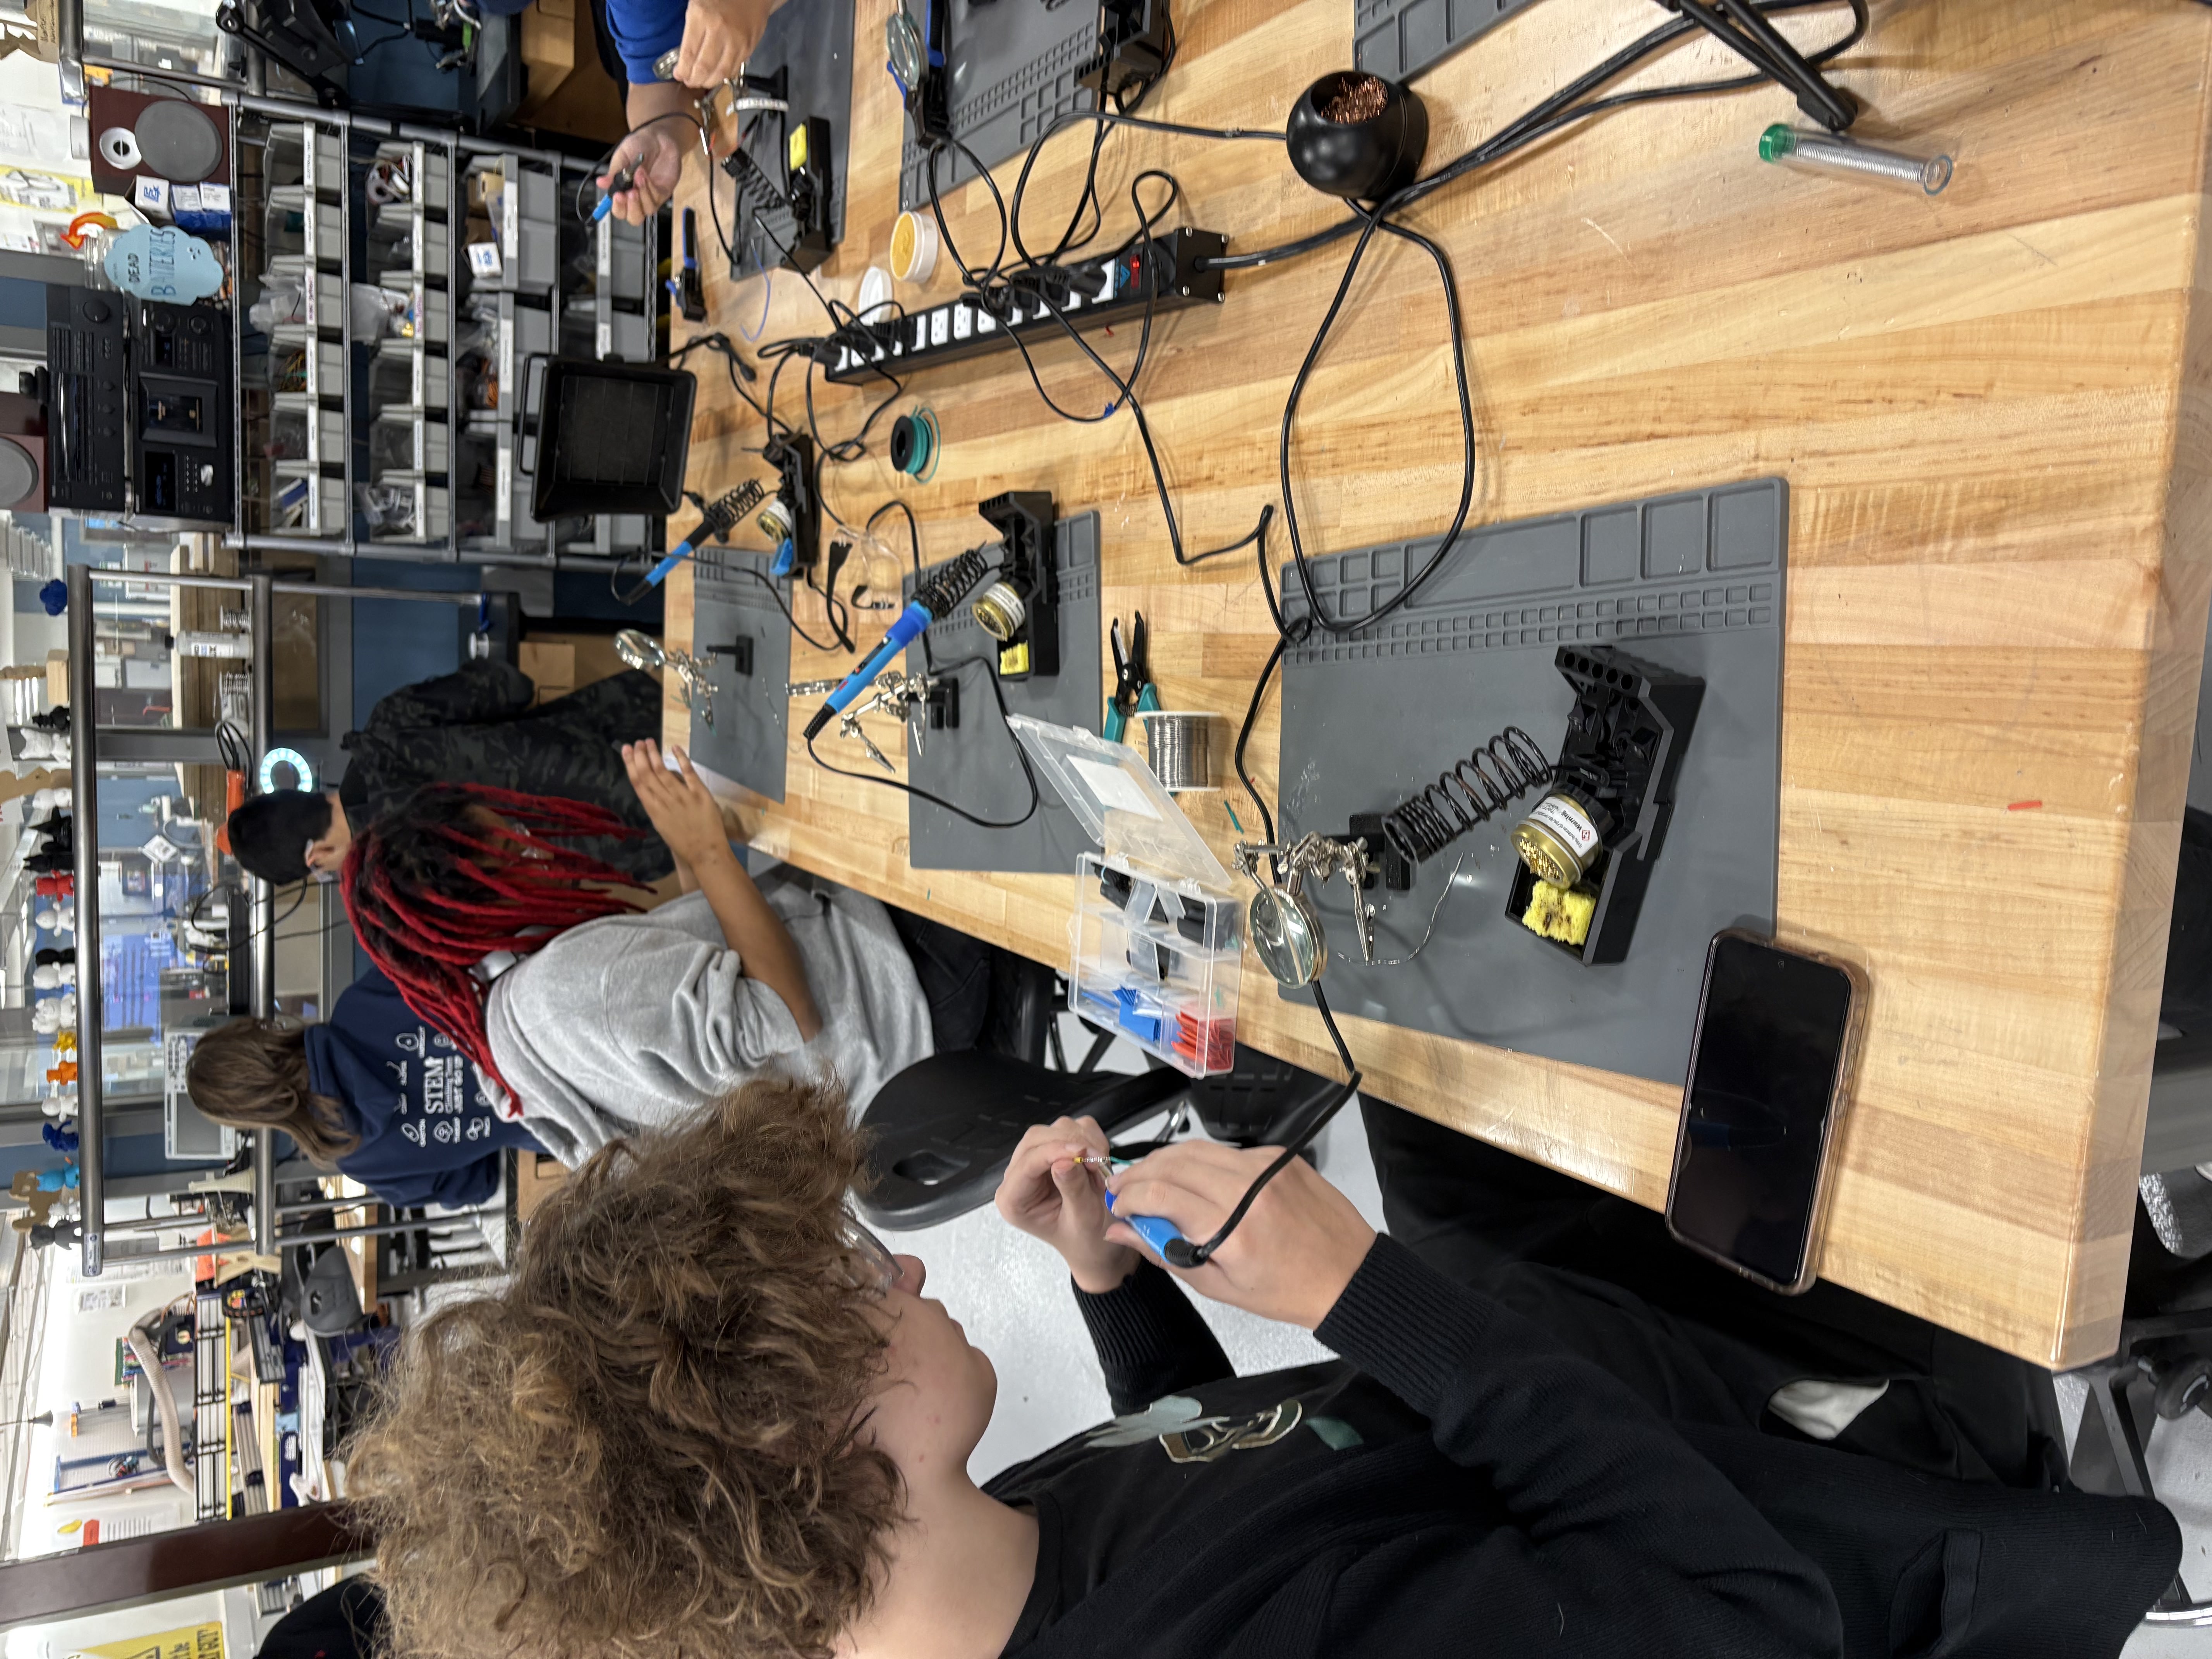
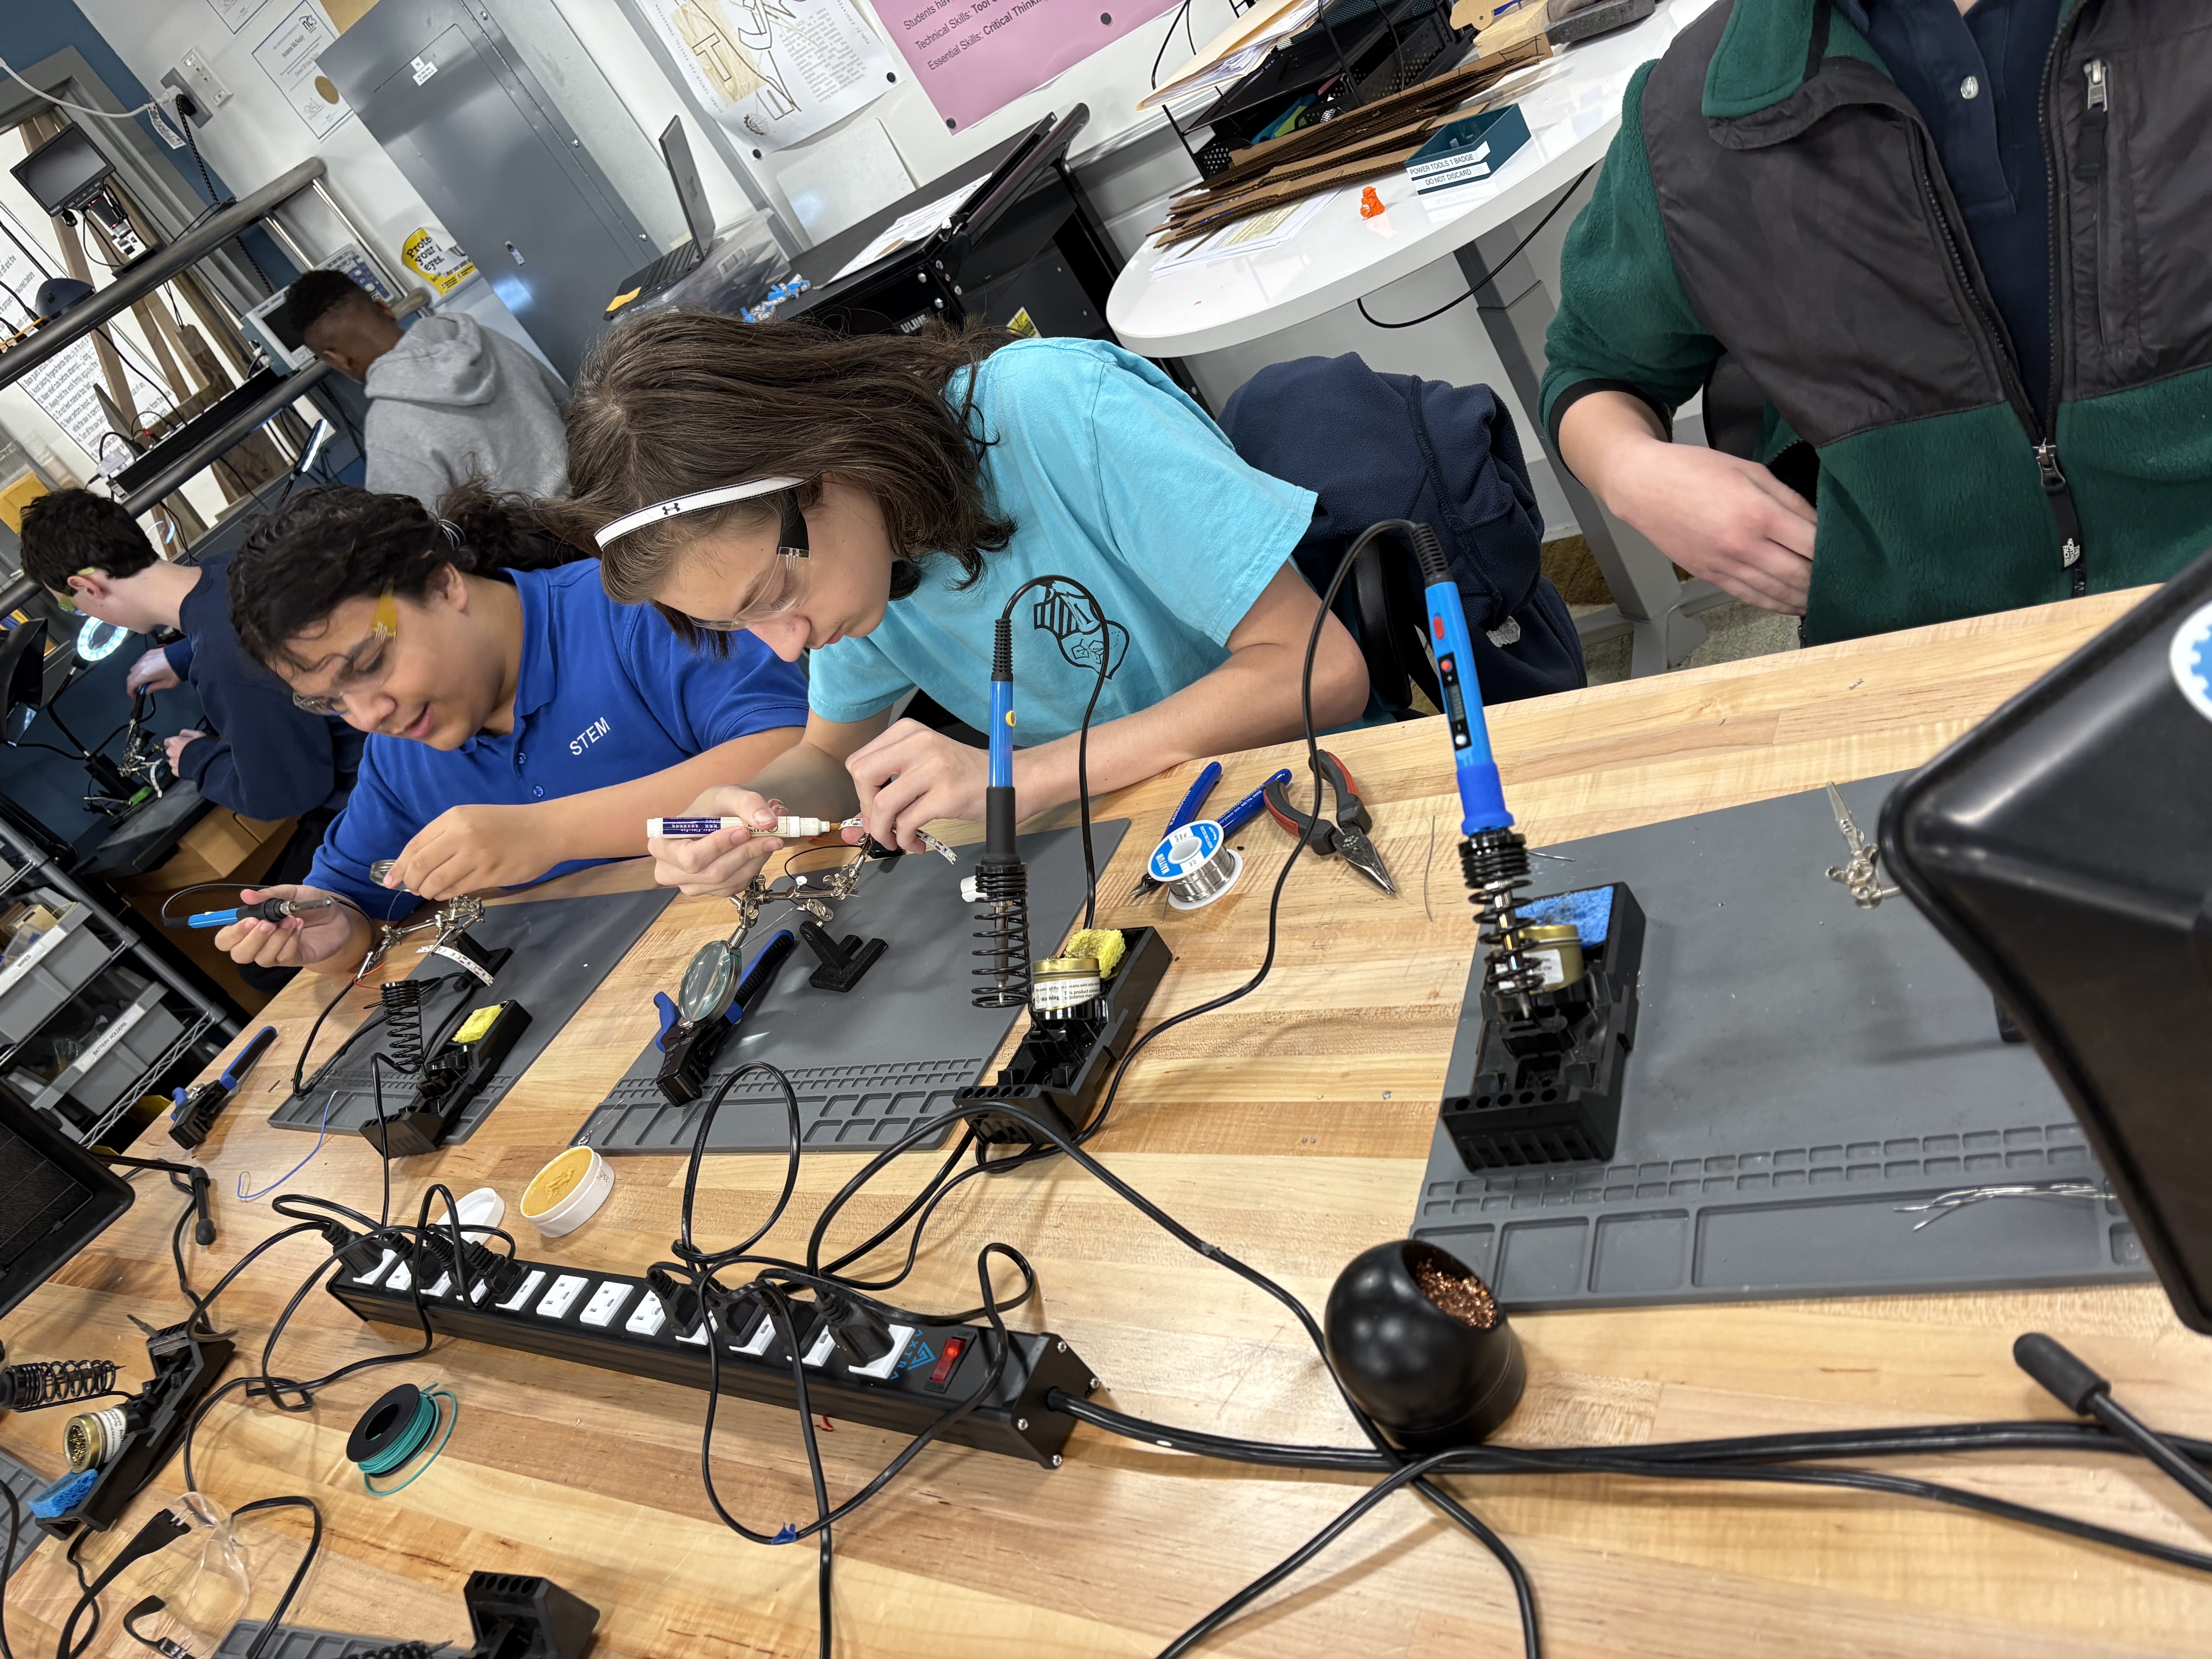
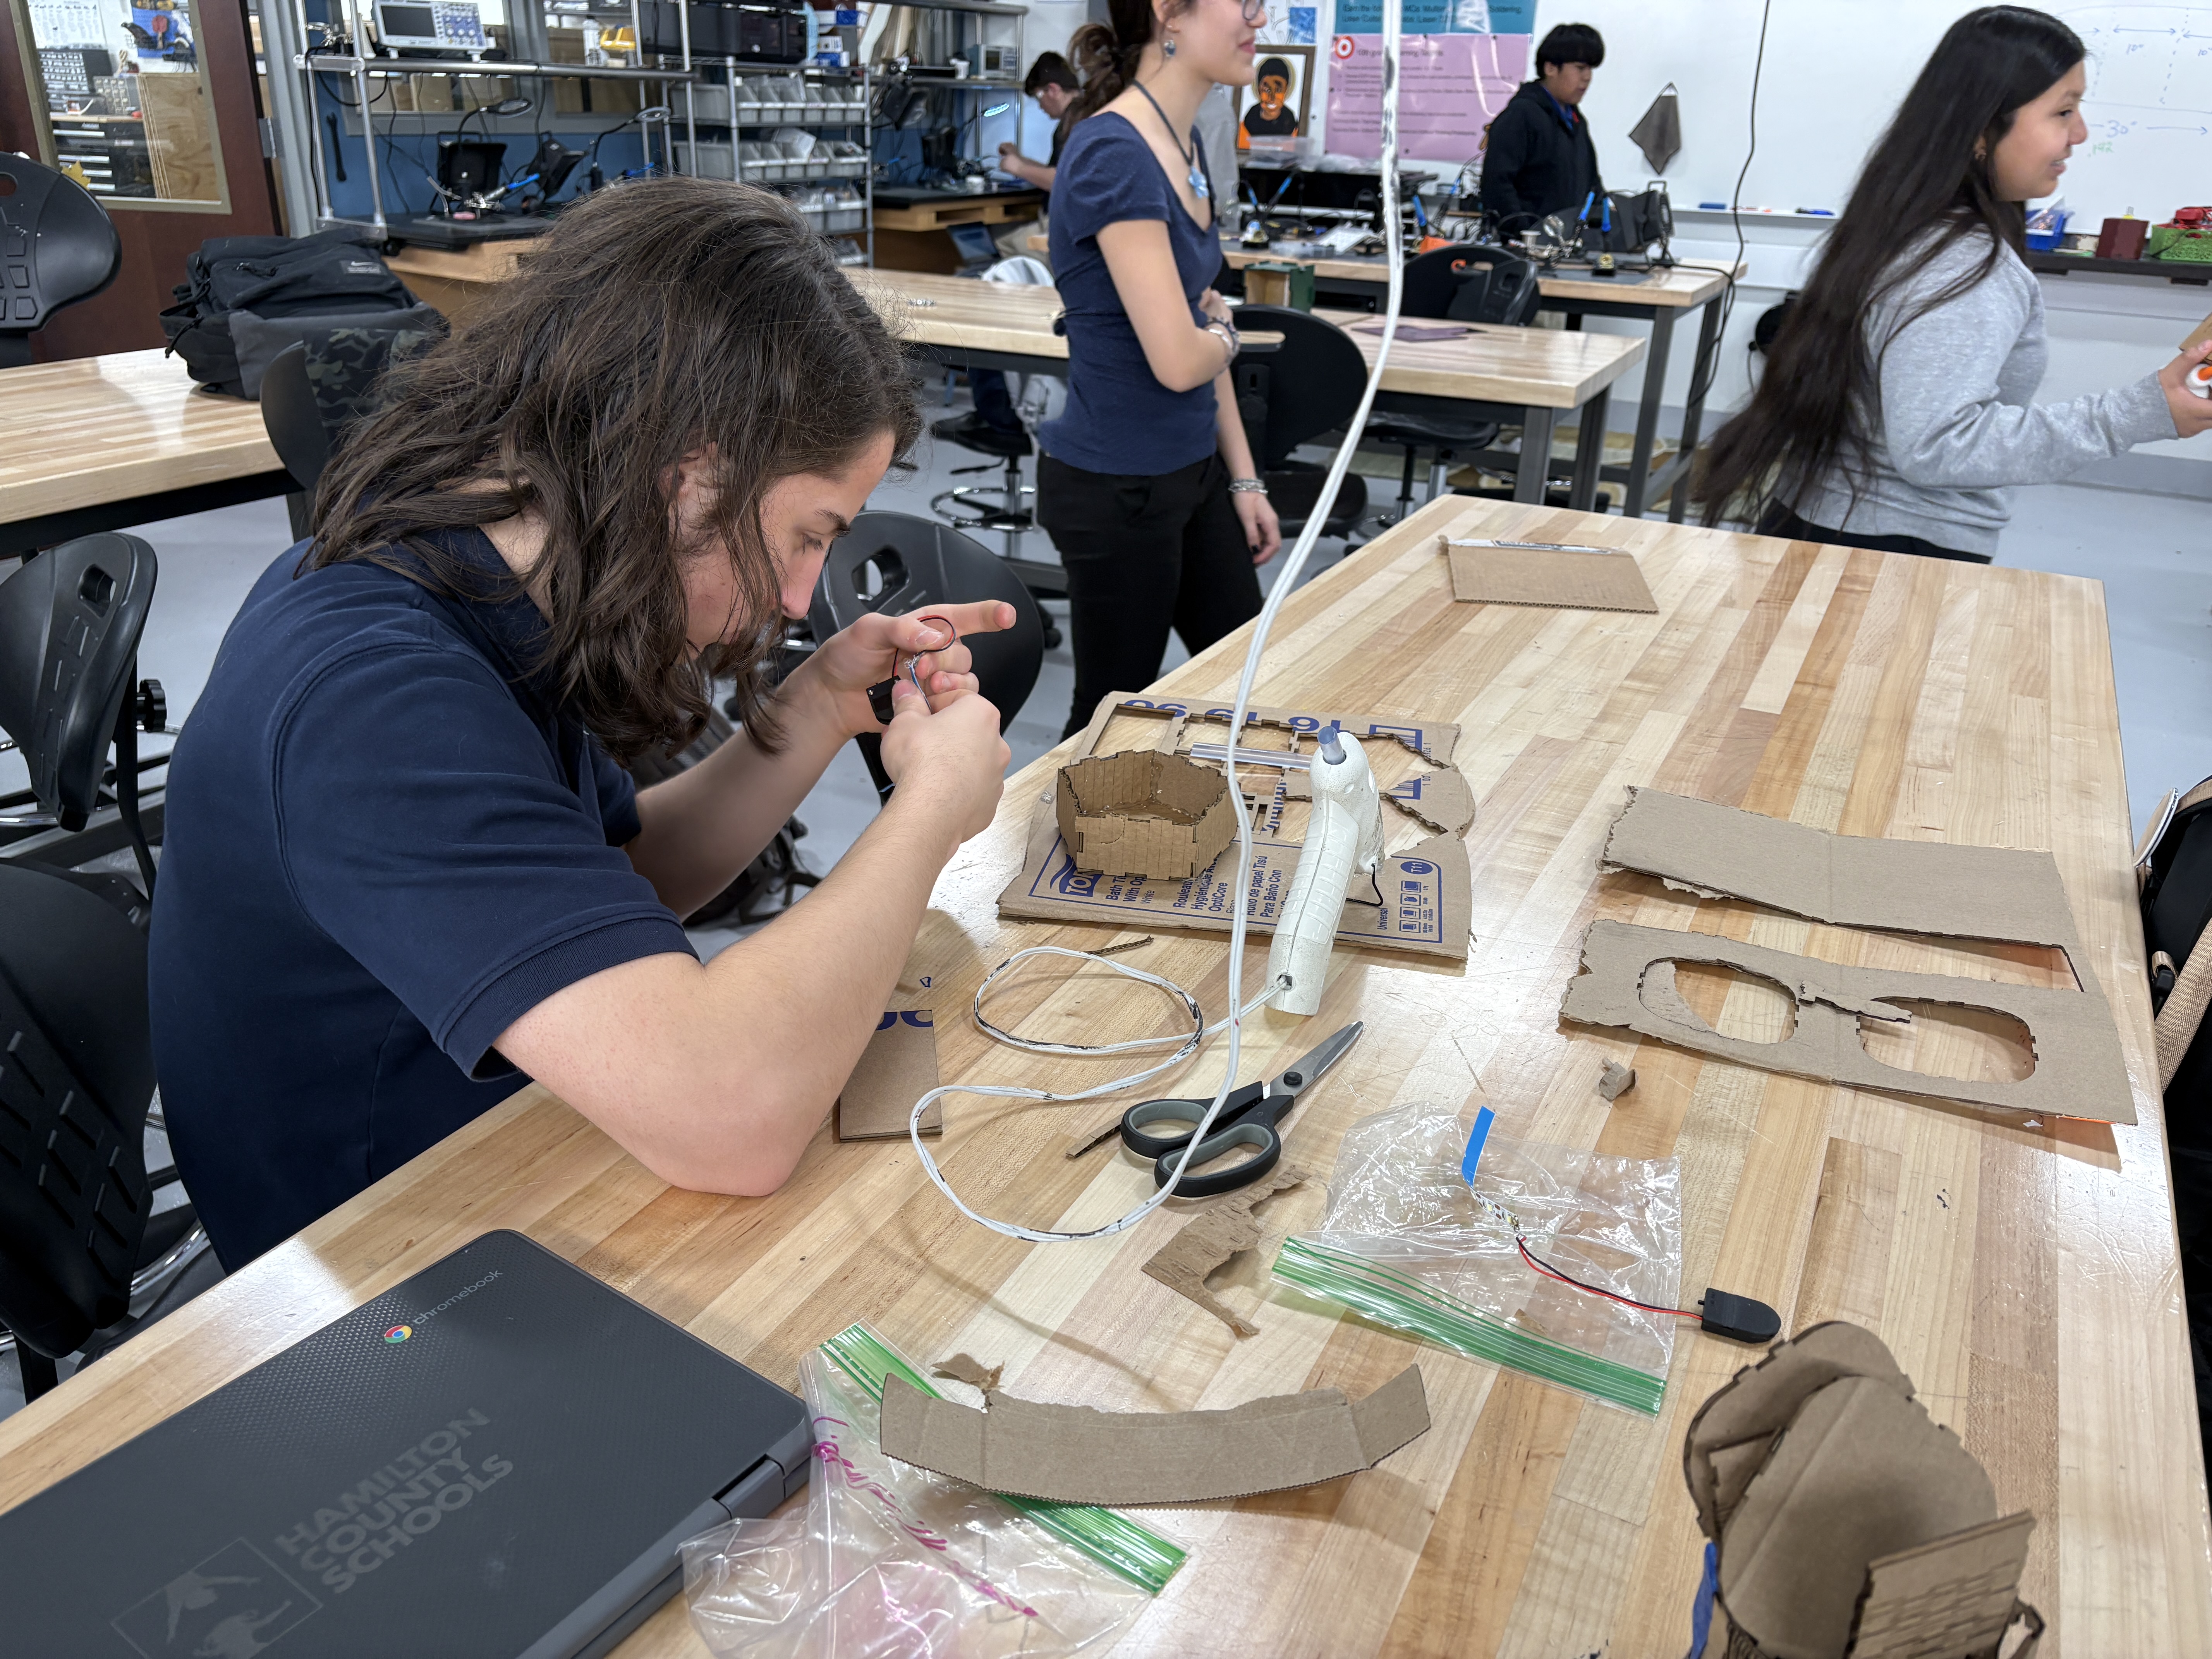
Solder connections within the circuit.
Students will review basic electronic circuits, learn to solder, and use a laser cutter safely.
Optional:
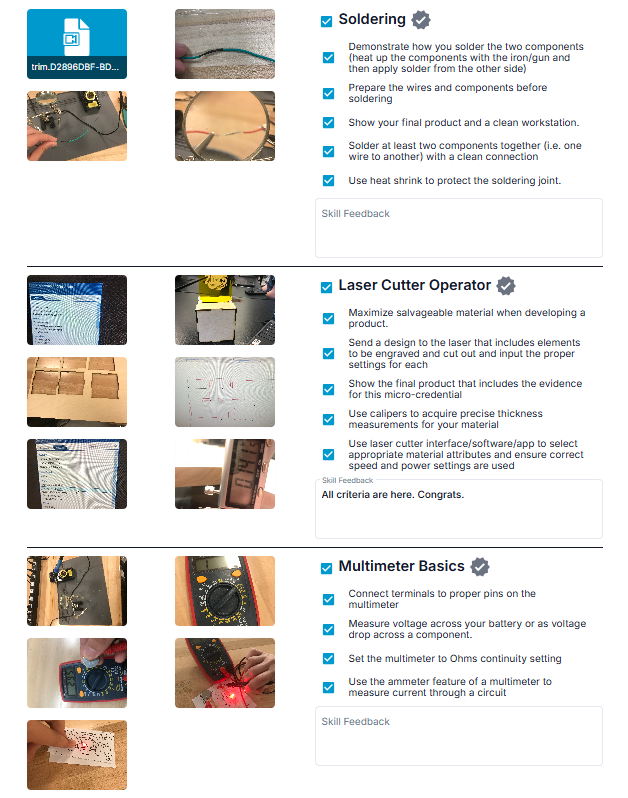
Earn the following Micro-credentials: Multimeter Basics, Soldering, Laser Cutter Operator, Laser 3D Designer
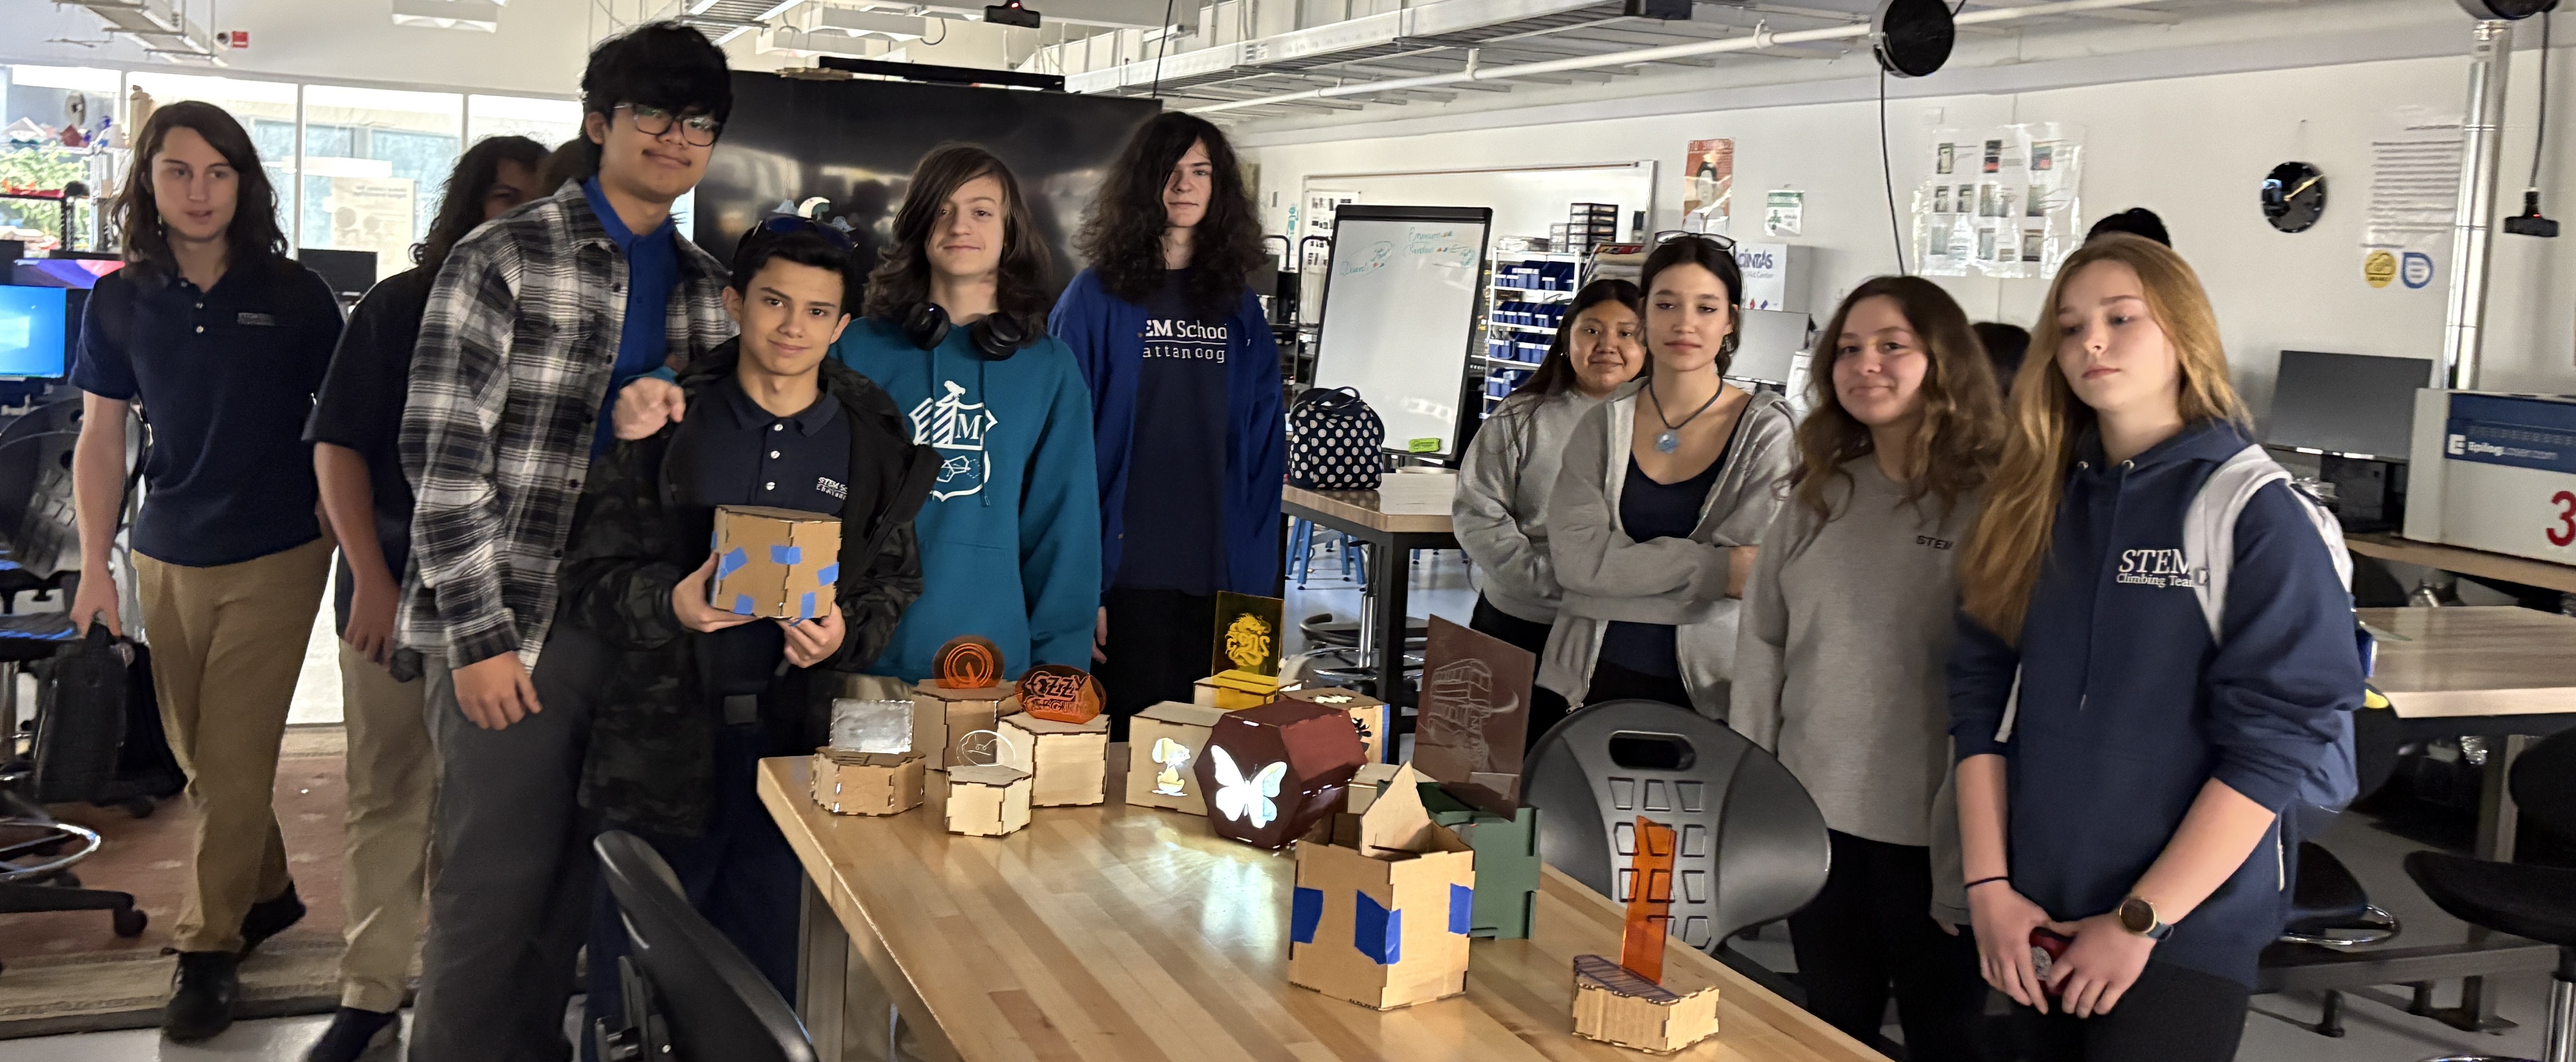
Every student in the class earned their soldering micro-credential. Some were able to earn the laser cutter and multi-meter credentials as well. In 3.5 weeks students were able to finish the project, however, were rushed when it came to documenting their progress with the laser cutters. Students were proud of their creative products and took home the lamps with enthusiasm.
Students will complete paper circuits to review a simple series circuit. They will use that circuit to learn how to use a multimeter.
Week 1:
M – Project Overview & Simple Series Circuit review (small paper circuits)
T – Safety Quizzes and review (Soldering & Laser Cutter)
W – Use Paper Circuits to learn and practice Multimeter (test resistance/continuity, current, and voltage)
TH – Soldering lesson and practice for documenting & earning micro-credentials
F- Complete Soldering and submit Micro-credentials
Week 2: M – Solder LED strip to jumper cables for prototyping 10 LED long strips for each student
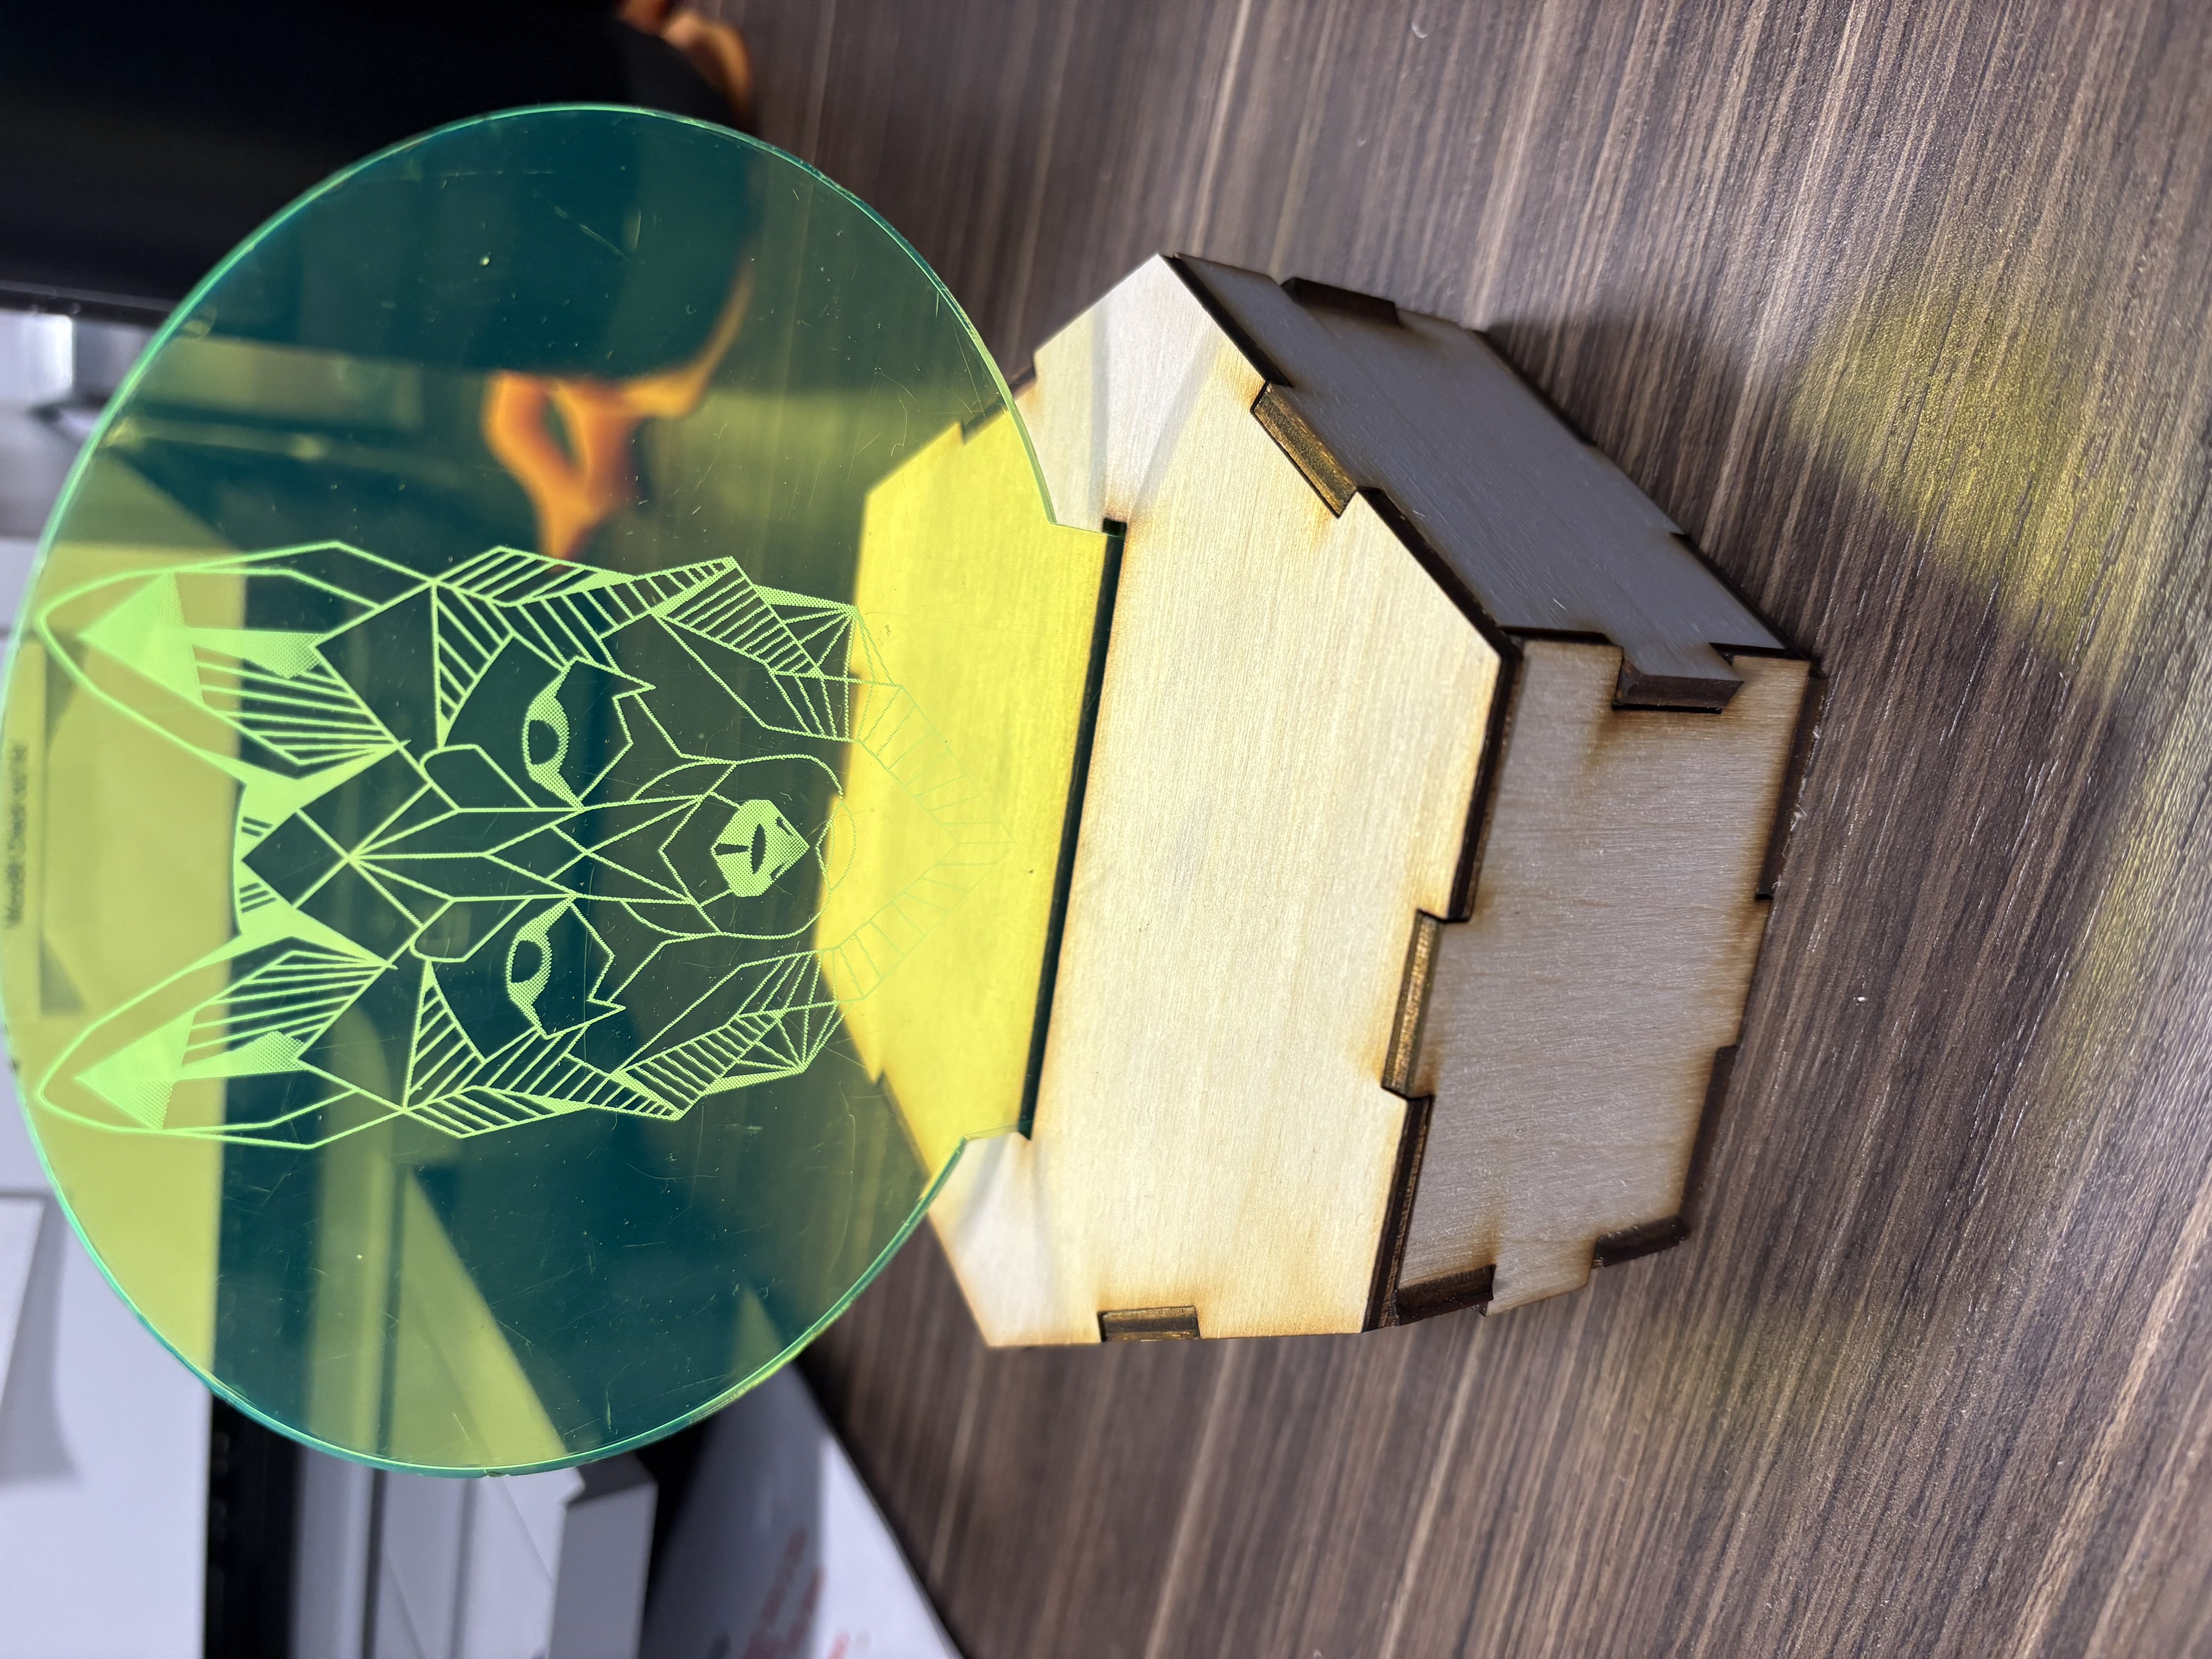
Students will design lamp "bodies" using makercase.com and then laser-cut them with slots for the acrylic and or open designs. Students may use vellum to add color to the light going out of any open holes. The other option is to cut and engrave translucent acrylic to achieve their desired design.
Week 2:
Continued:
T – Light Project: brainstorm ideas, make a parts list
W/TH – Light Project Build (MakerCase and Corel Draw focus group for laser cutting)
F – Light Project Build
Week 3:
M – Light Project build
T – Light Project build
W/TH – Light Project build
F – Complete Micro-credentials and present final lamp to the group
Having trouble? Let us know by completing the form below. We'll do our best to get your issues resolved quickly.
"*" indicates required fields