- Loading…

In this 5-day series workshop, children will learn the basics of coding in the programming language “Scratch” in order to create their own game.
Every day they will be a new code to learn and add to the game. On the last day, participants will use all the commands learned to create their own game as a final project.
-Computer.
-Internet connection.
-Scratch software.
Link of software: https://scratch.mit.edu/
On first day, participants will be introduced to Design the game interface, including background and components.
Presentation :
1- Who are we and what we do in Studio 56.
2- Which zone we will be in today.
3- Introduction to teams software user-interface.
4- Introduce the story behind the workshop.
5- Explain what is game development.
6- Explain what are multi-player games.
7- Introduction to Scratch software user-interface.
Prototype:
1- Explain the user-interface of Scratch platform and the structure of the platform.
2- Explain how you can add components to the user-interface by choosing from the sprites collection.
3- Explain how you can change the design of the sprites using the paint tool (change color, add text, etc).
4- Explain how you can change the properties of the sprites like position, size, direction, etc.
5- Explain how to add a background picture to the game using the “choose a backdrop” button.
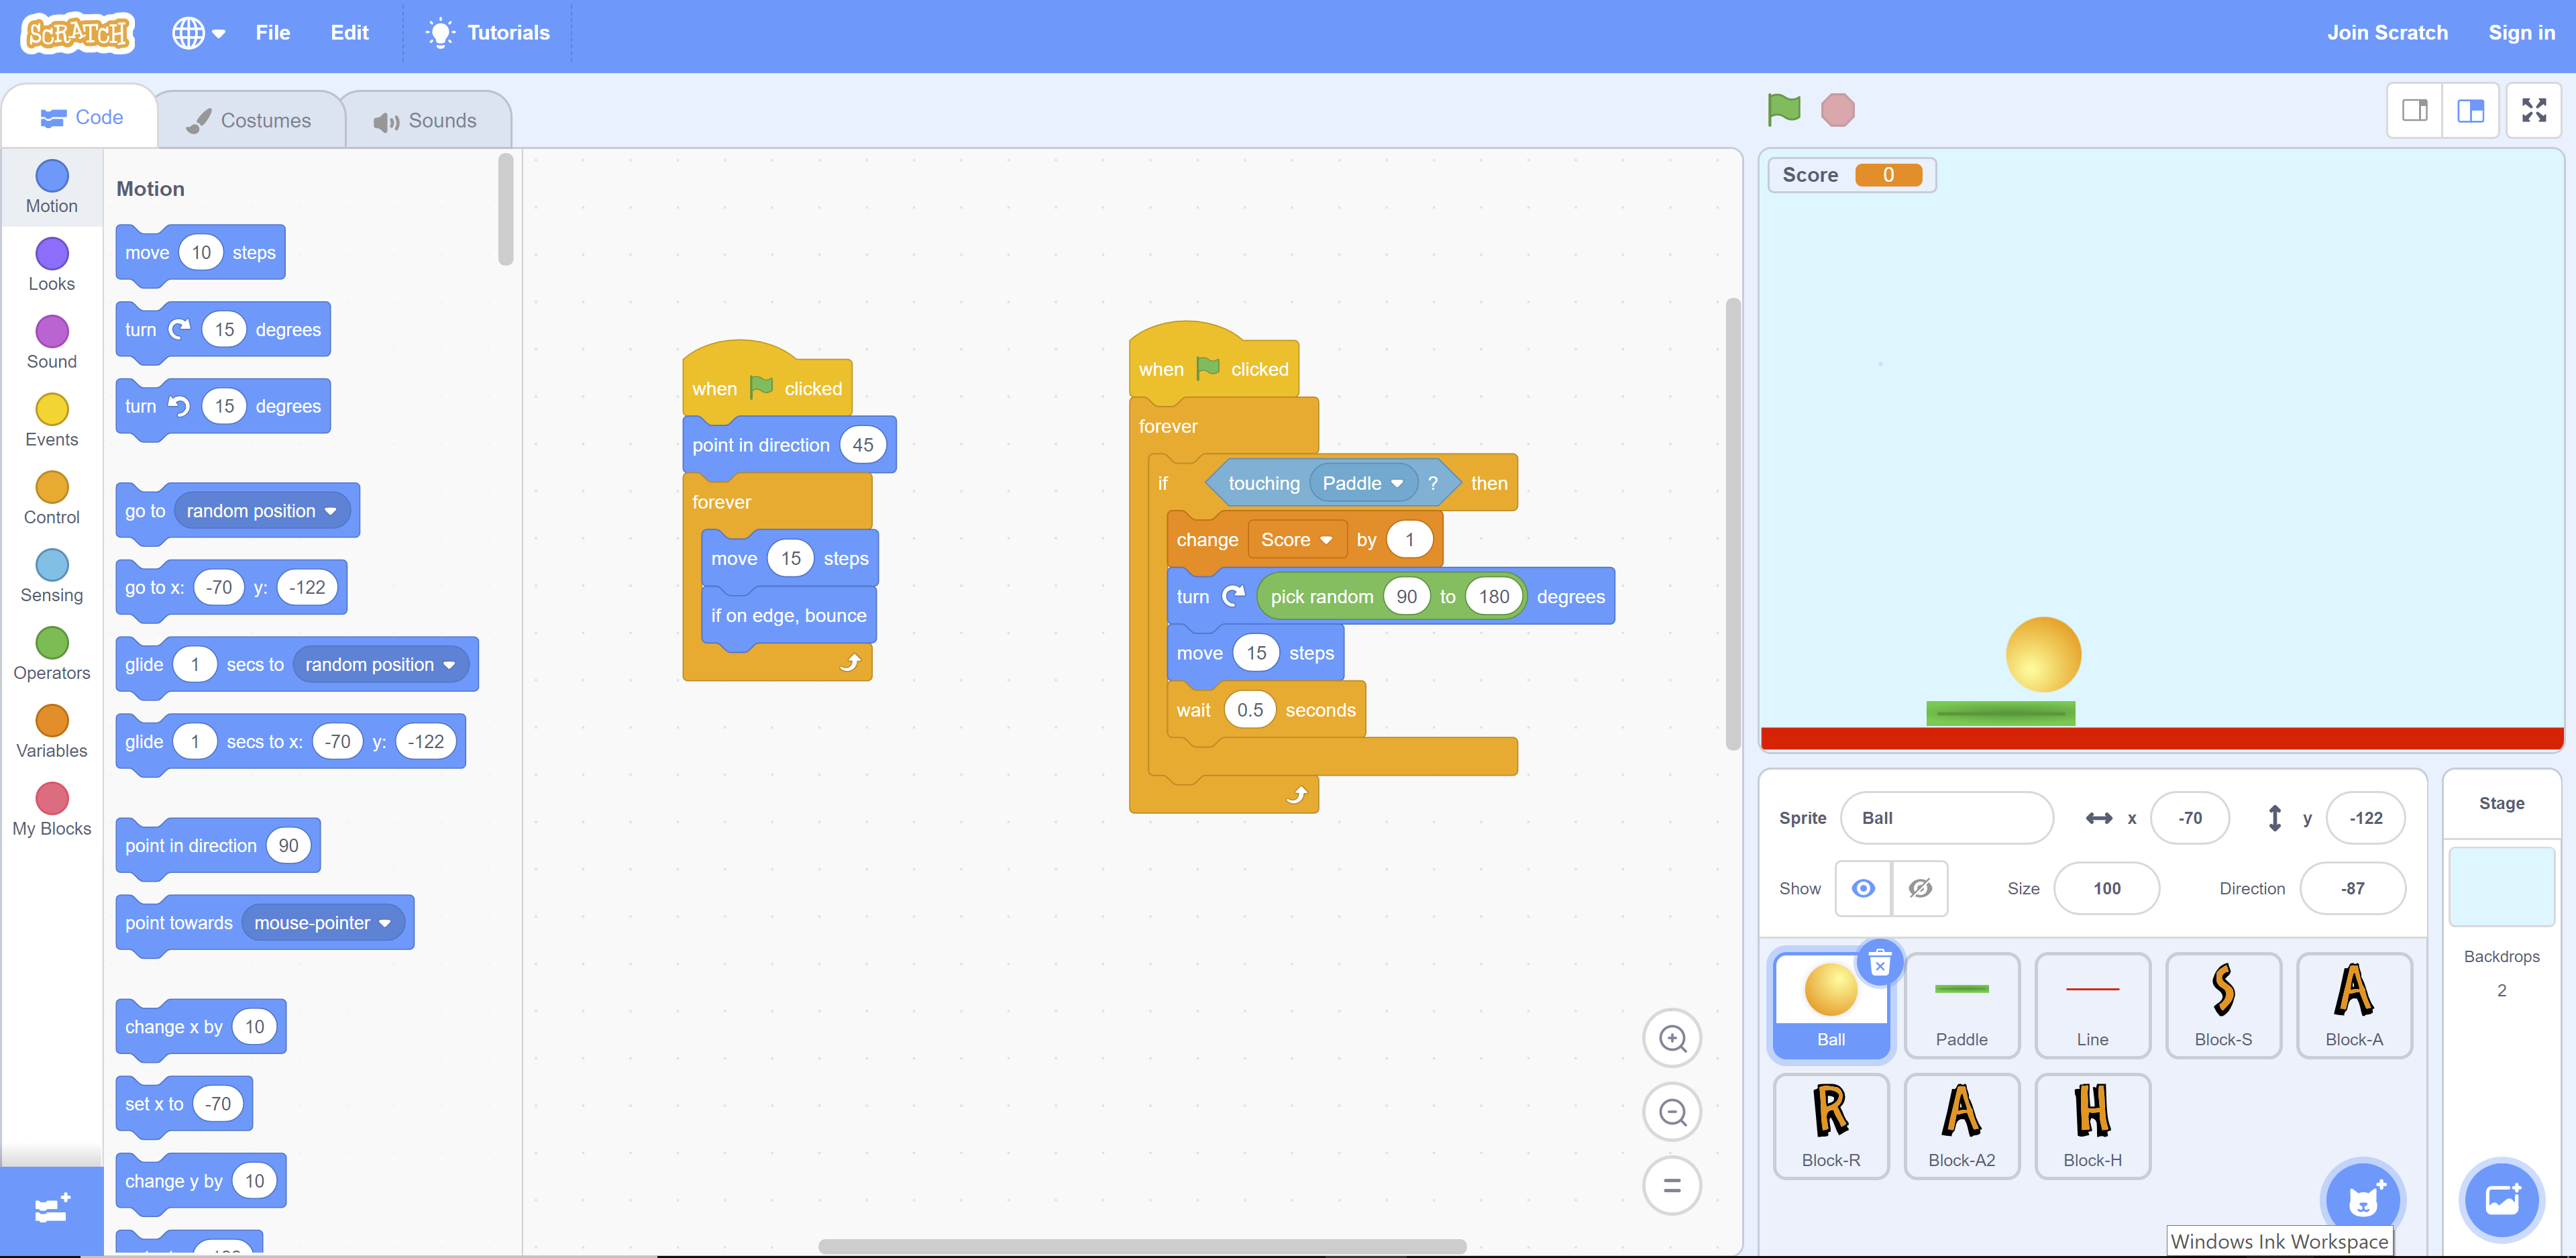
6- Add three sprites using the “choose a sprite” button: ball, paddle, red line.
7- Explore the paint tools to change the color of the ball and add text in the middle of it.
8- Save the project on your desktop by going to File >> Save to your computer.
On the second day, participants will be able to Use block coding to program the movements and actions of the game.
Presentation :
1- Overview on what was done on Day1.
2- Video about the meaning of coding.
3- Explain what is Block coding.
4- Explain the difference between block-based and text-based coding.
Prototype:
1- Explanation of the coding section interface of the Scratch platform.
2- Explanation of the different types of blocks and their purpose.
3- Explain how blocks can be added (by dragging then dropping them).
3- Use the appropriate blocks to code the continuous random movements of the ball.
4- Program the scoring system to increase the score by 1 every time the ball touches the paddle.
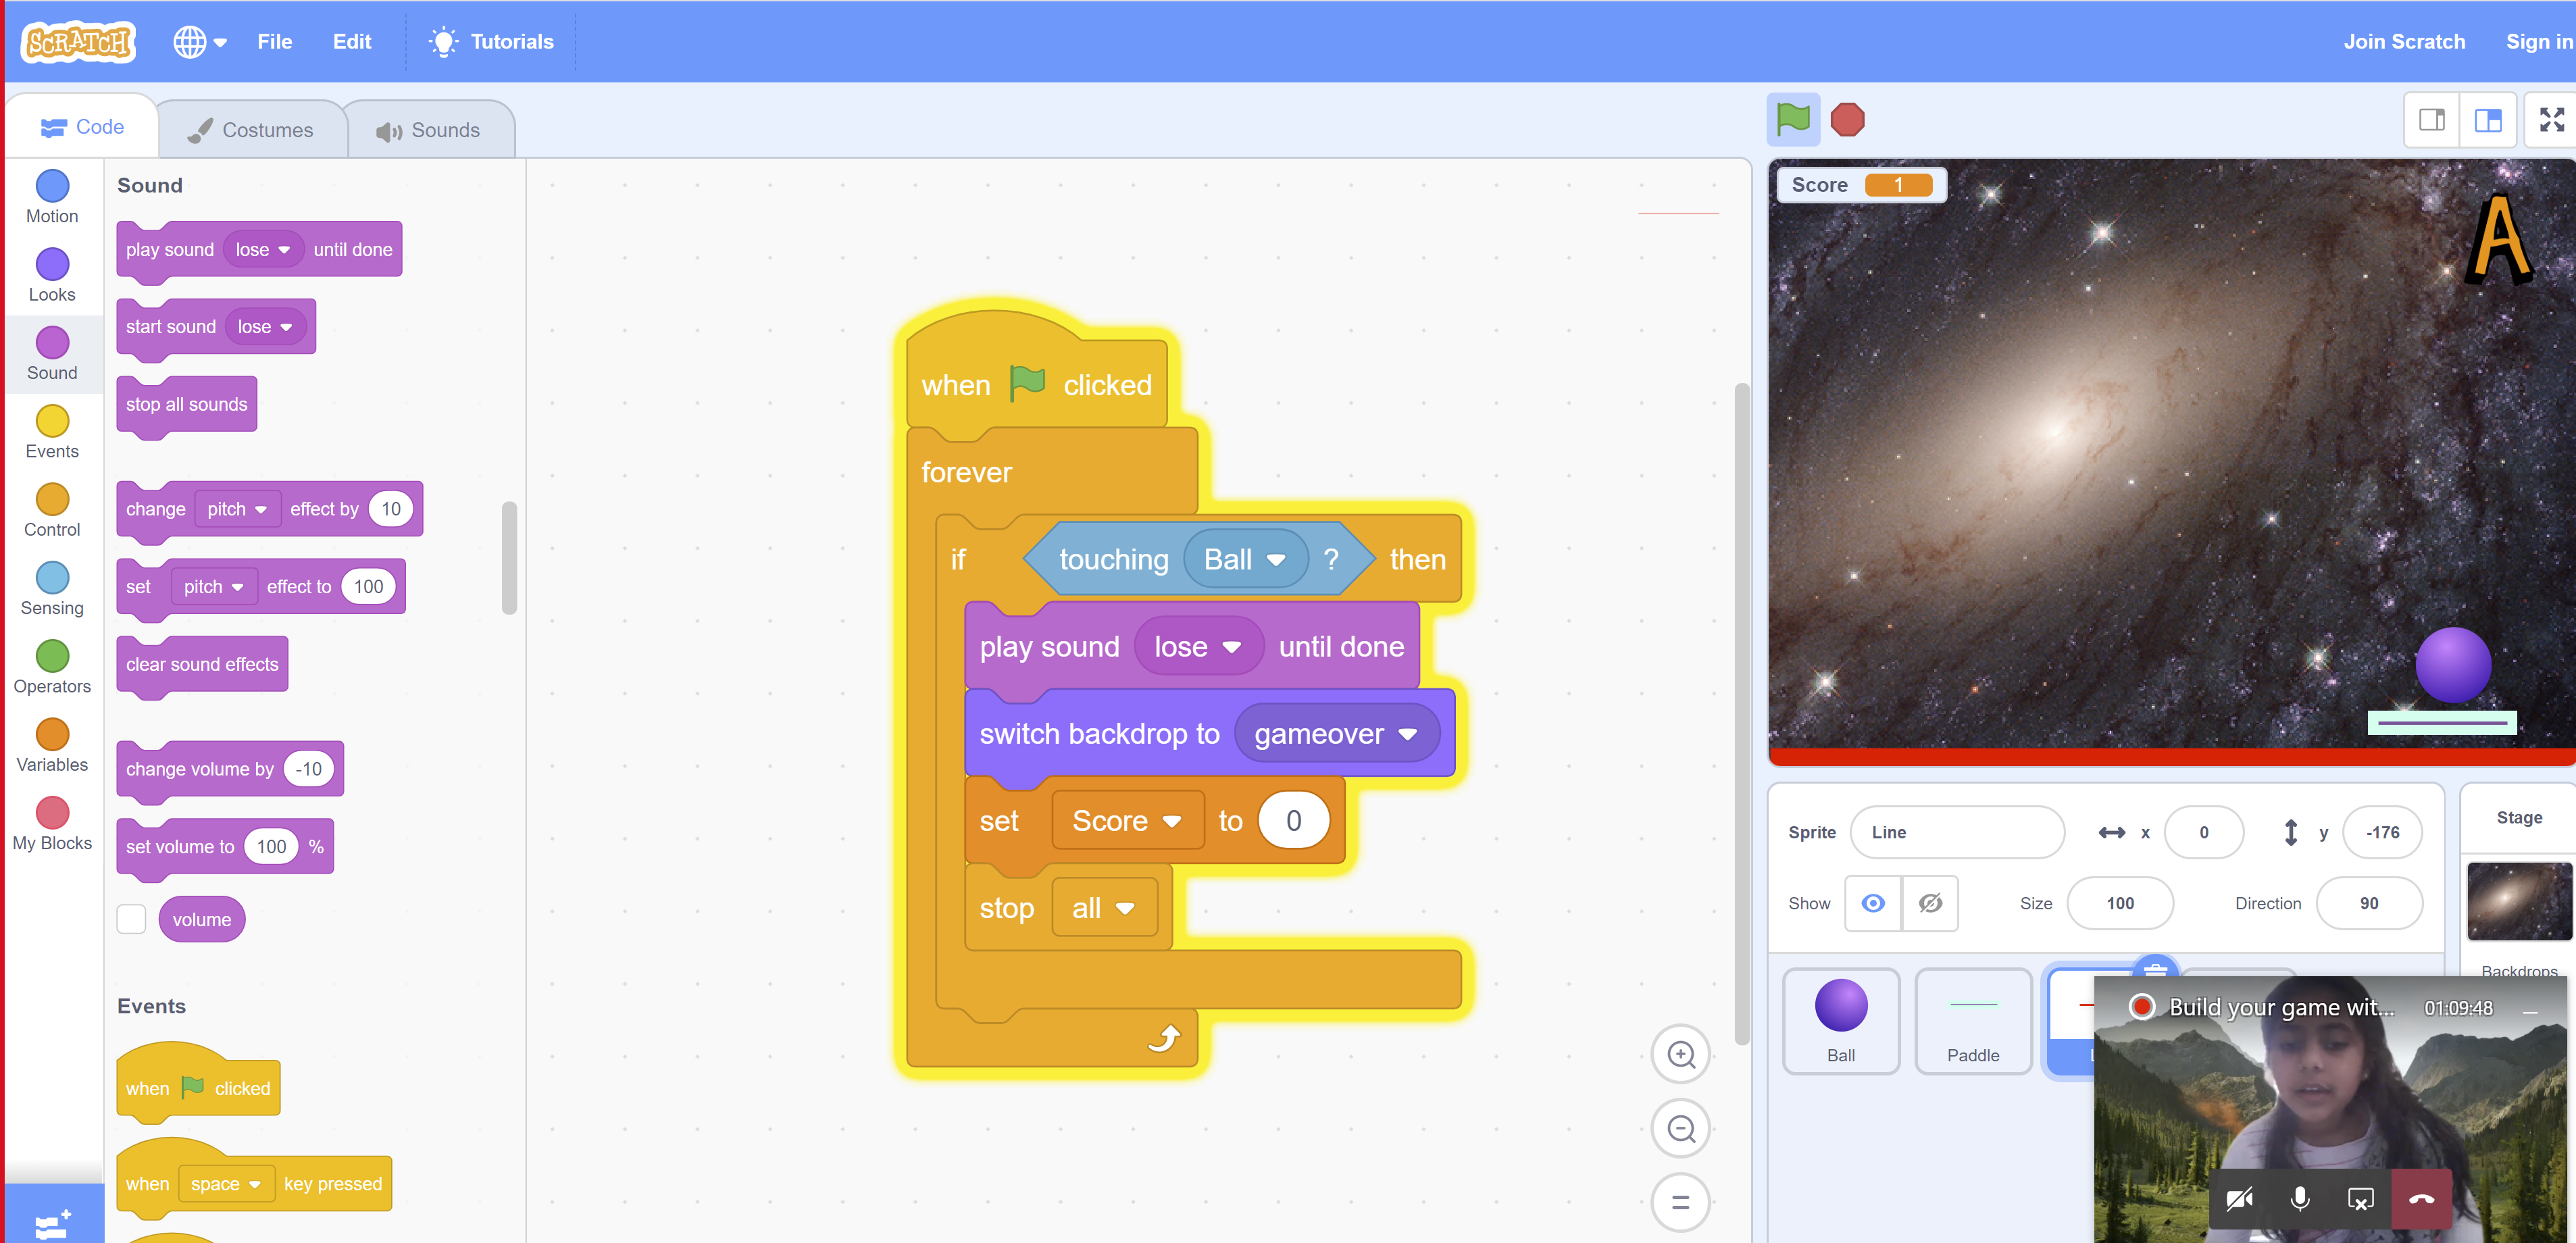
5- Program the losing condition; when the ball touches the red line.
6- Program the paddle to follow the mouse input.
6- Test the game and fix any issues found.


On the third day participants will be able to add different effects and animation to make the game more appealing.
Presentation :
1- Overview on what was done on Day2.
2- Explain which effects and animations can be added to the game.
3- Explain how effects and animations can be added.
Prototype:
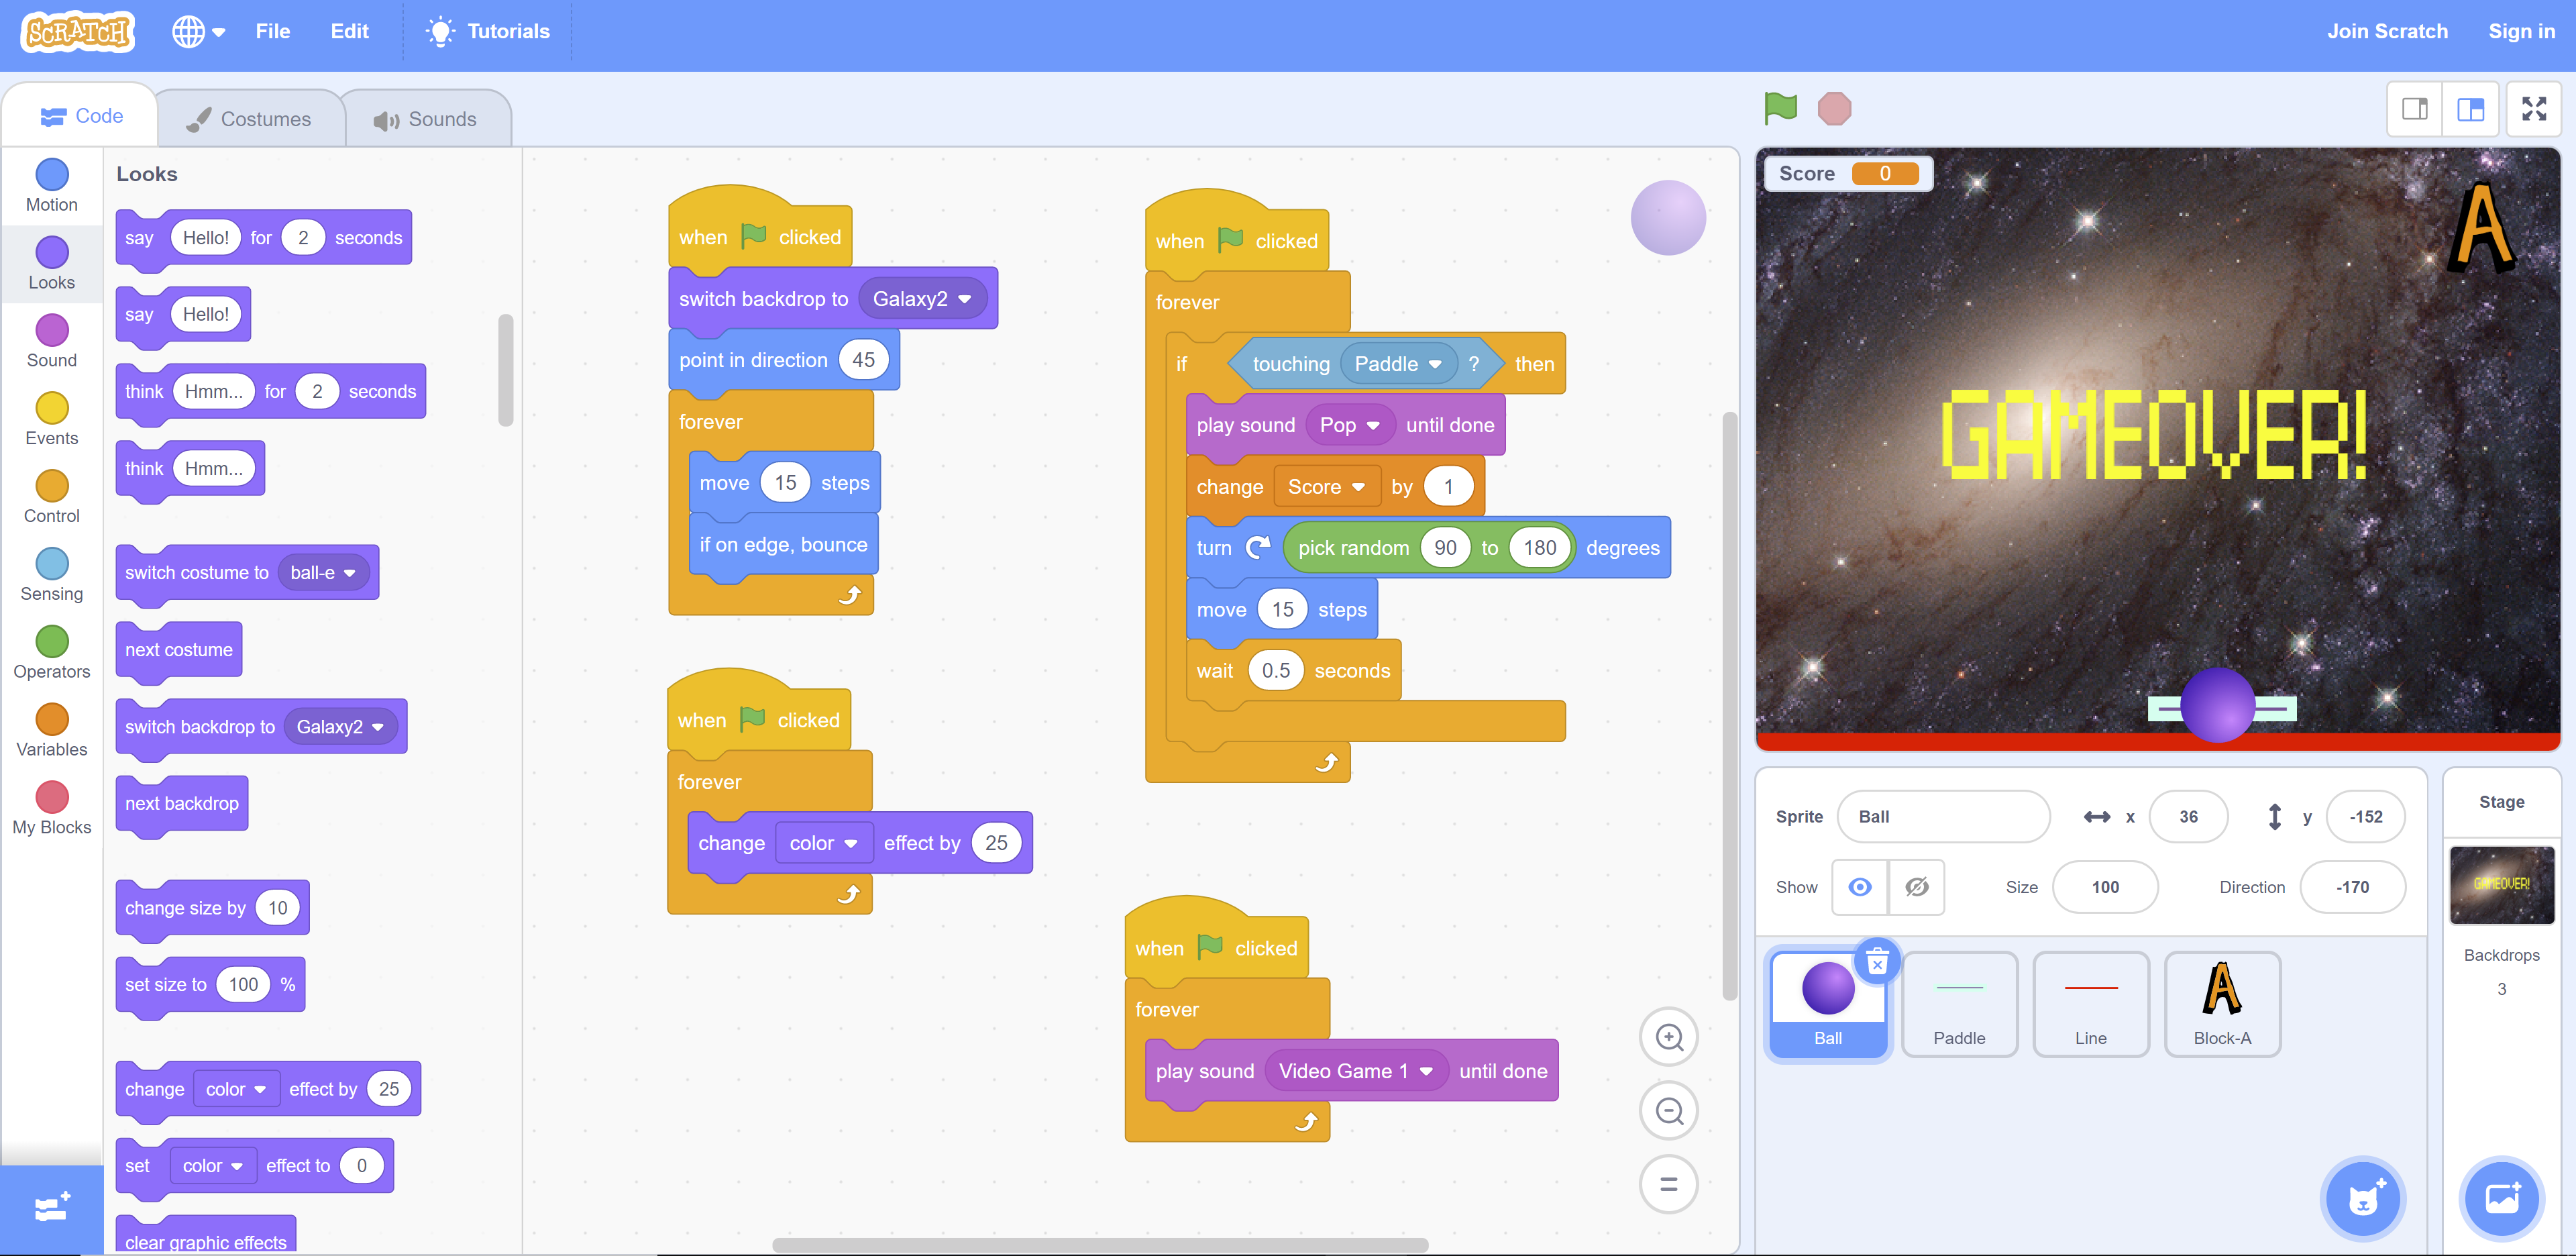
1- Add the color changing effect to the ball using block coding.
2- Add different letter components and change their size.
3- Animate the letters using block coding.
4- Let the participants explore and create different effects by themselves.
5- Test the game and fix any problems found.


On the fourth day participants will learn how to Record an own sound and add it to the game.
Presentation :
1- Overview on what was done on Day3.
2- Explain how sound can be added or recorded.
Prototype:
1- Explanation of the Sound section interface of the Scratch platform.
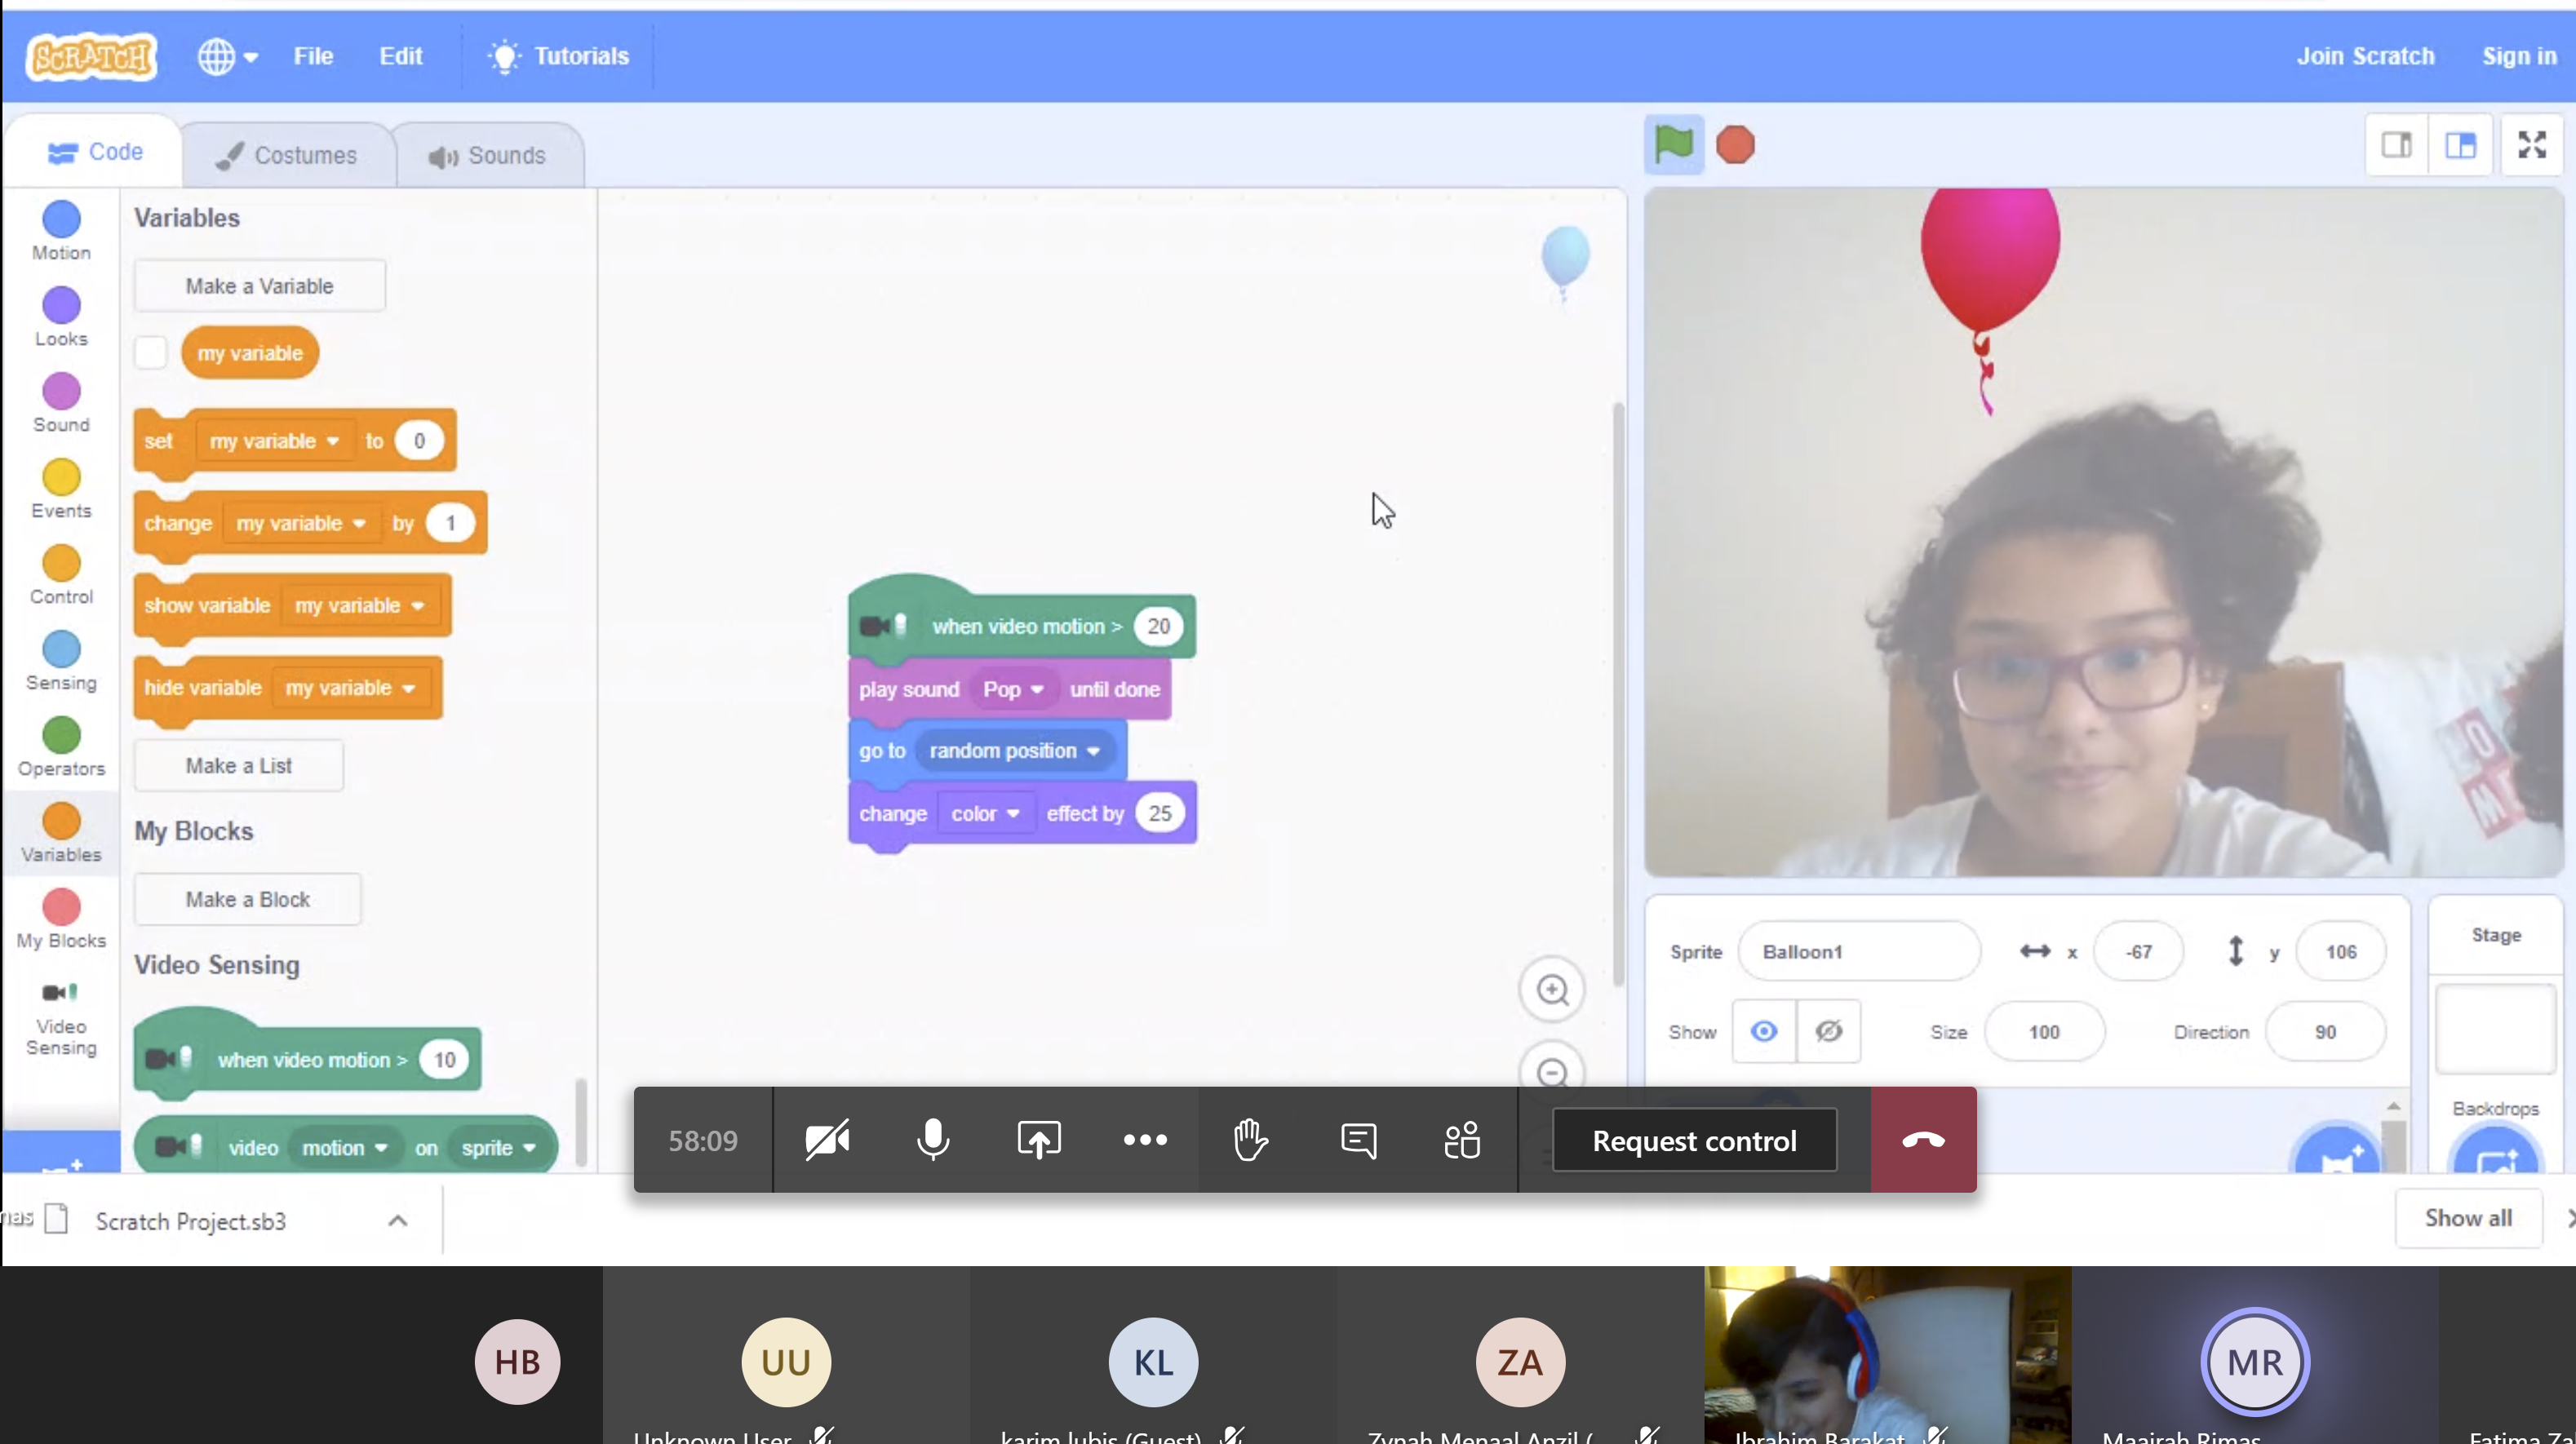
2- Explain how sound can be recorded Scratch, saying the instructions of how to play the game.
3- Explain the sound effects and how they can be added.
4- Use block coding to add the sound to play at the beginning of the game.
5- Use block coding to add losing sound when the player loses.
6- Test and fix any problems found.


Having trouble? Let us know by completing the form below. We'll do our best to get your issues resolved quickly.
"*" indicates required fields