Explore VR Education city – SCOPES-DF

Lesson Details

Age Ranges
Standards
Fab-Design.2
Author
Additional Contributors

You need to login or register to bookmark/favorite this content.

Author

Studio 5
Studio 5
Other
In line with the Ministry of Communications and Information Technology’s Digital Youth Strategy, STUDIO 5 is mainly aimed at nurturing youth as digital learners by sharpening their 21st century learning skills, as they develop in an all-pervasive digital environment. In… Read More

Summary

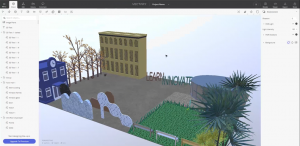
Participants will be introduced to the concept of Virtual Reality and 3D design. They will learn how to design a sustainable 3D environment of an education city, using Vectary software.

What You'll Need

-Computer/laptop.

-Internet connection.

-Vectary software: https://www.vectary.com/

The Instructions

Presentation

During the presentation, the participants will discuss the purpose of the workshop and different topics to learn and exchange knowledge.

1- Who are we and what we do in Studio 56.

  • What is a Fablab.
  • What you find inside a Fablab.
  • The different zones of Studio 5/6: Technology, creativity, and software zones.

2- Introduction to Teams interface.

3- Introduce the client letter of the workshop.

  • The story behind the purpose of this workshop.

4- What is the meaning VR?

  • The definition of Virtual Reality.

5- Video about Virtual reality.

6- Examples of VR practices.

7- Some used terms in the 3D design field. 

  • The definition of “Mesh”.
  • The definition of “Model”.

8- Introduction to Vectary platform.

  • Getting started on Vectary.
  • Rotation tool.
  • Scaling and moving tools.
  • Basic objects.
  • Background color/image.

9- Modern education city inspired design.

10- How you can export your project and test it in VR.

  • Export the “.obj” file from Vectary, once done with the design.
  • Open any VR design software like Unity, Cospaces.
  • Import the “.obj” file to the VR software, add character, and build the project.

10- What we will be doing today.


Prototype

The instructor will be explaining the steps of building the prototype, and the participants will be following the steps.

1- Sign up and make an account on Vectary platform.

2- Explain the user-interface and structure of the Vectary platform.

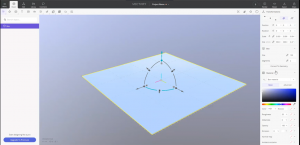
3- Explain how to create a new empty project.

  • Create a new bland project.
  • Show the templates available.

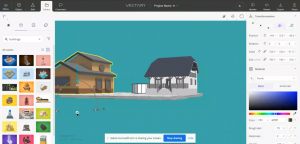
4- Explain how you can add components from the library to the scene.

  • Drag and drop components from the Library to the 3D environment.

5- Explain how you can use the Edit tool to the components.

6- Explain how you can add material to the components.

  • Drag the material to the object.

7- Explain how you can change the sky color.

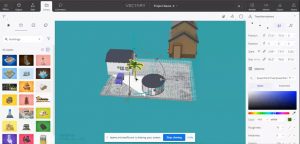
8- Explain how you can import components from outside the program to the scene.

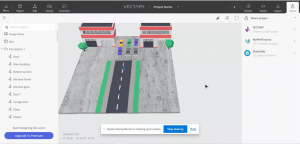
9- Build a 3D Education city.

  • Add base (ground) and give it a texture.
  • Add buildings representing the different buildings of the education city.
  • Add open-study area, park, ..etc..
  • Add background color/image.
  • Add seats using different shapes.

10- Explain the formats of exporting the project (.stl, .obj).

11- Share and discuss the results of the participants.

Standards

  • (Fab-Design.2): I can participate in design reviews with prepared presentation materials as well as give and receive feedback from peers.

Lesson Feedback

Contact us

Having trouble? Let us know by completing the form below. We'll do our best to get your issues resolved quickly.

"*" indicates required fields

Name*
Email*
This field is for validation purposes and should be left unchanged.
?